
This is the third installment of a multipart interview with Richard Taylor, the lead designer at Robert Abel & Associates, who were the original special effects team hired to produce the designs of the miniatures and special effects for Star Trek: The Motion Picture.

Part III
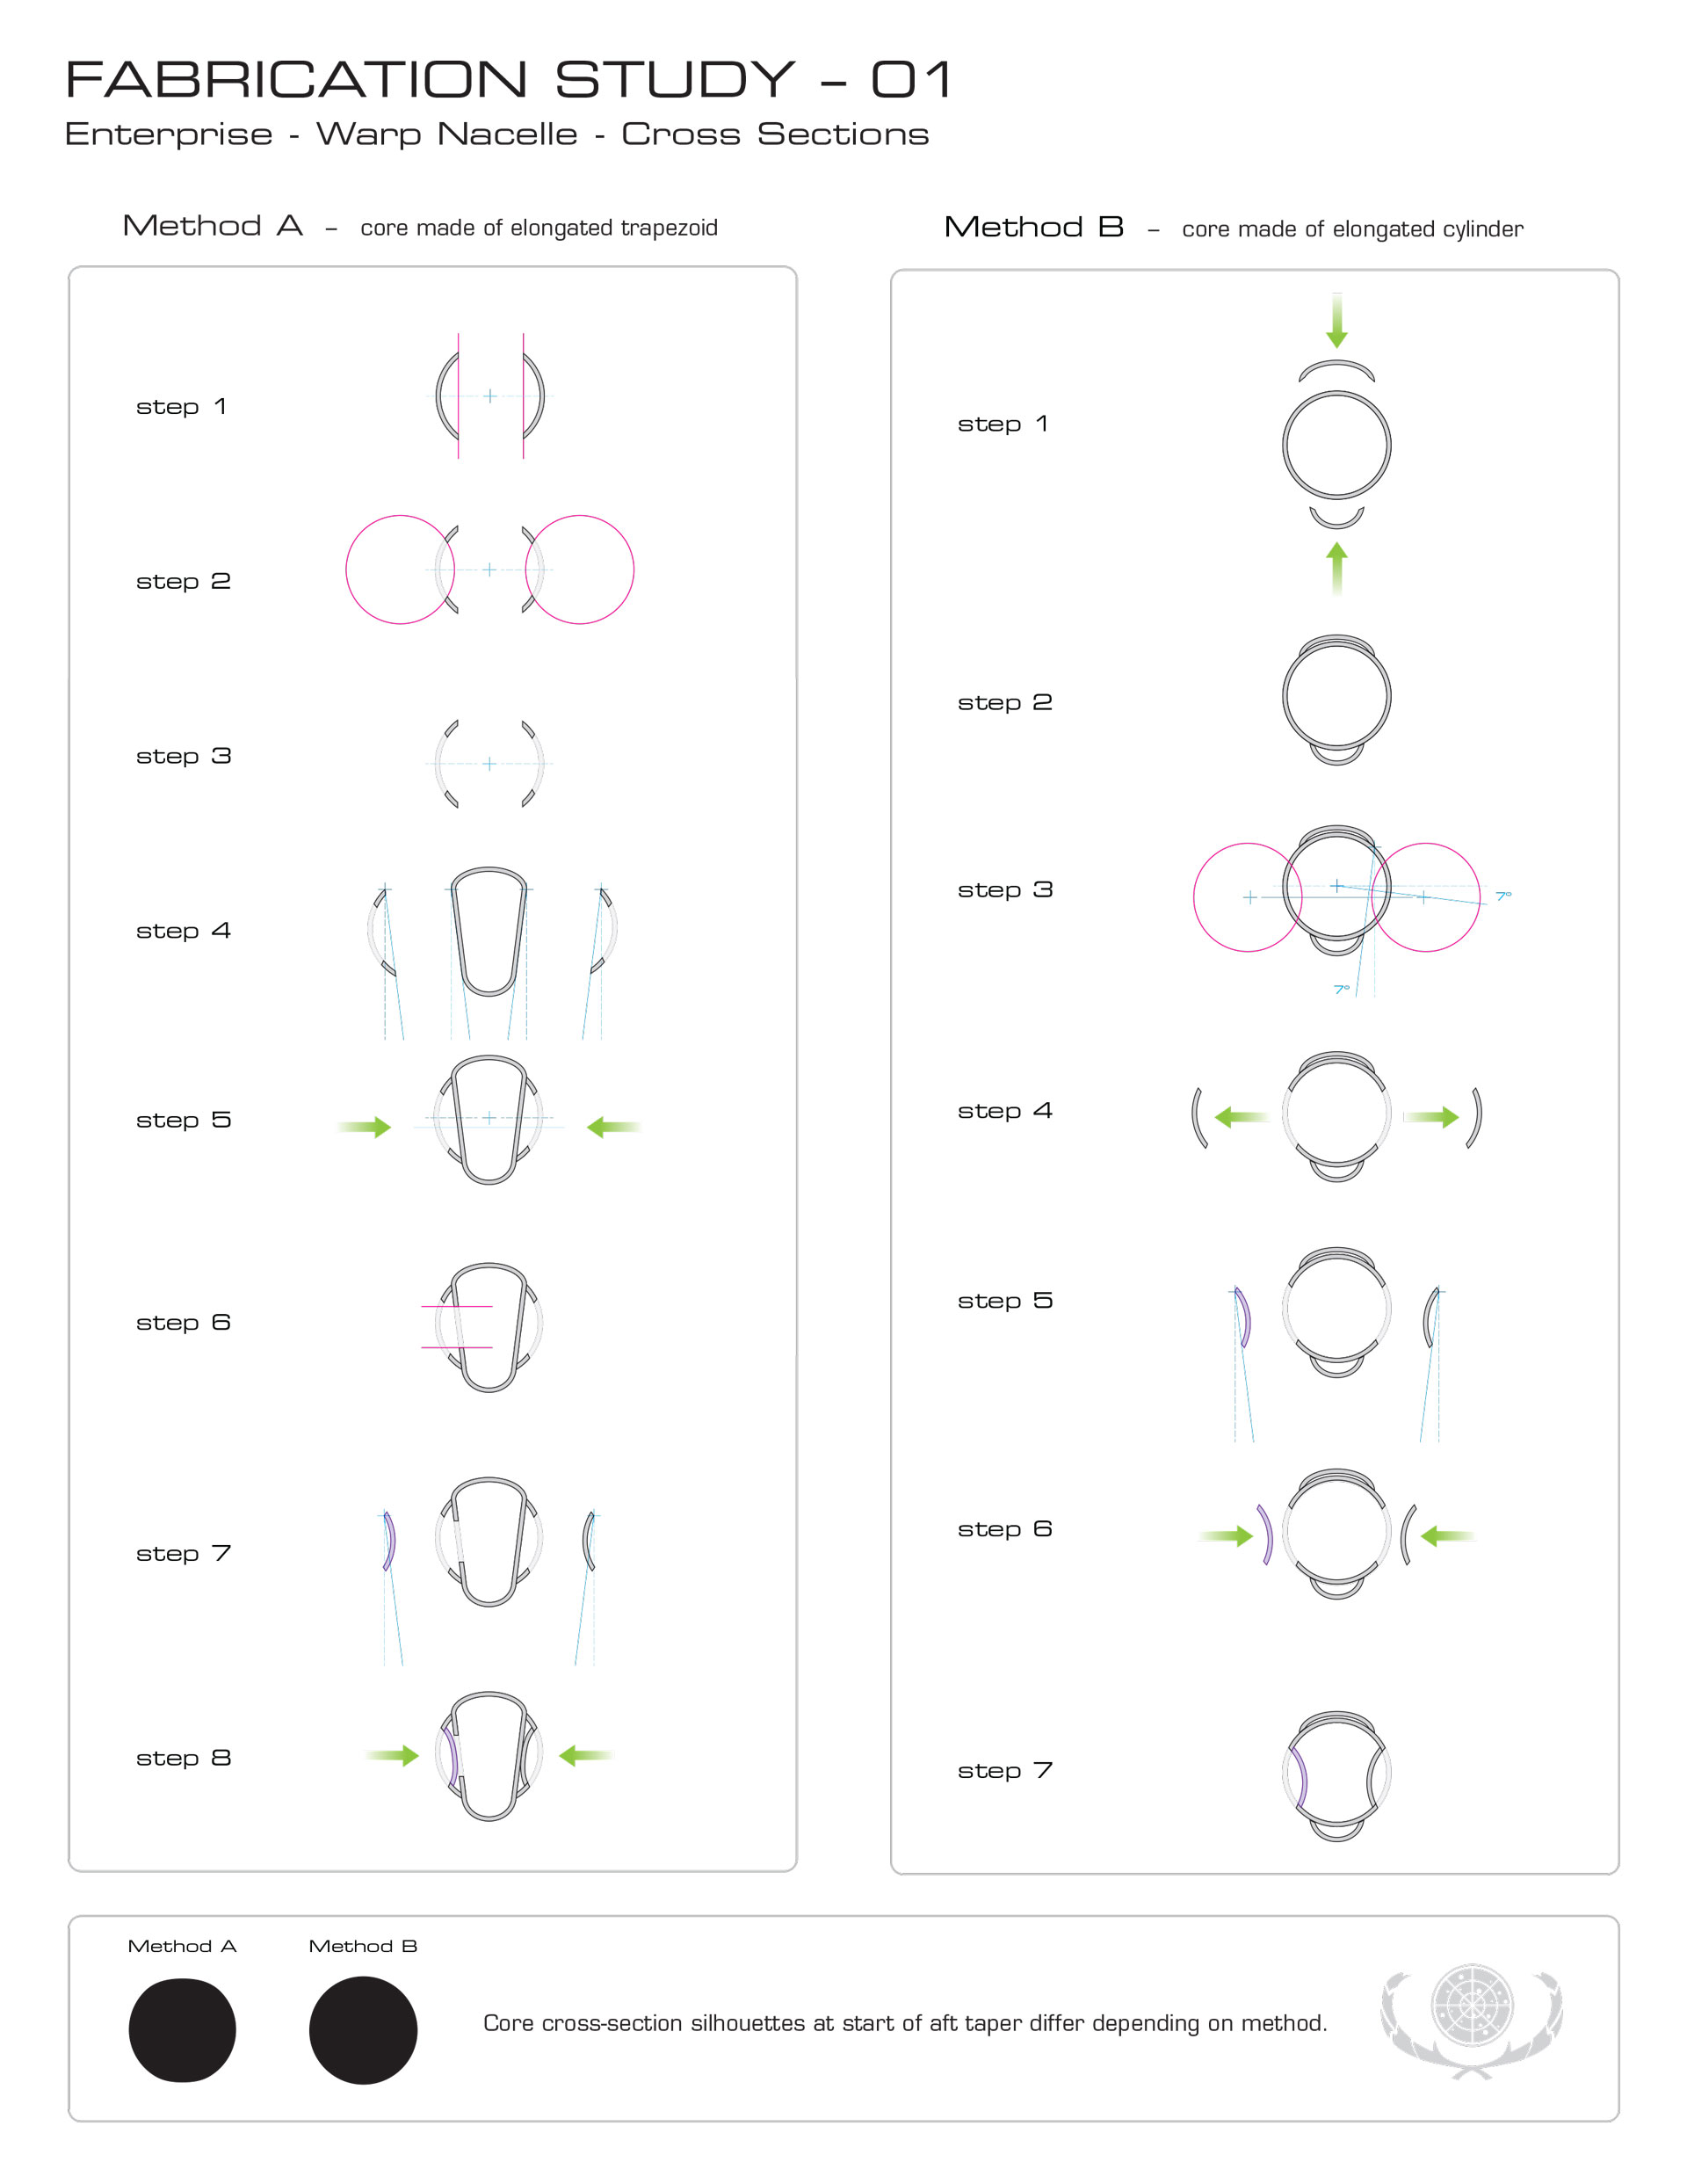
Fabrication Study 01. Click to enlarge. (Third Wave Design)
Gore: As far as the actual fabrication of the nacelles. themselves, and this again harkens back to my earlier question about getting an accurate picture of what was fabricated for the film, was the nacelle structure itself built around that sort of rounded trapezoidal cross section from the Phase II design?
Or did it start from a cylinder and then the other shapes and components were then added onto it?
This is illustrated in the reference material I sent you prior to this conversation, in the first page I listed a “Method A” and a “Method B” and I was wondering which approach was used for the core structure?
And going back a little further as to why I am asking this question is, if it was “Method A”, which it looks like it is in some of the ‘behind the scenes’ photographs, including the one you sent me just ahead of this interview, what that does is it would make it not a true perfect circle in its cross section, but rather a sort of “flattened”, sort of rounded rectangle, which would then affect the shape of the overall proportions when people try and work out “blueprints” and such.
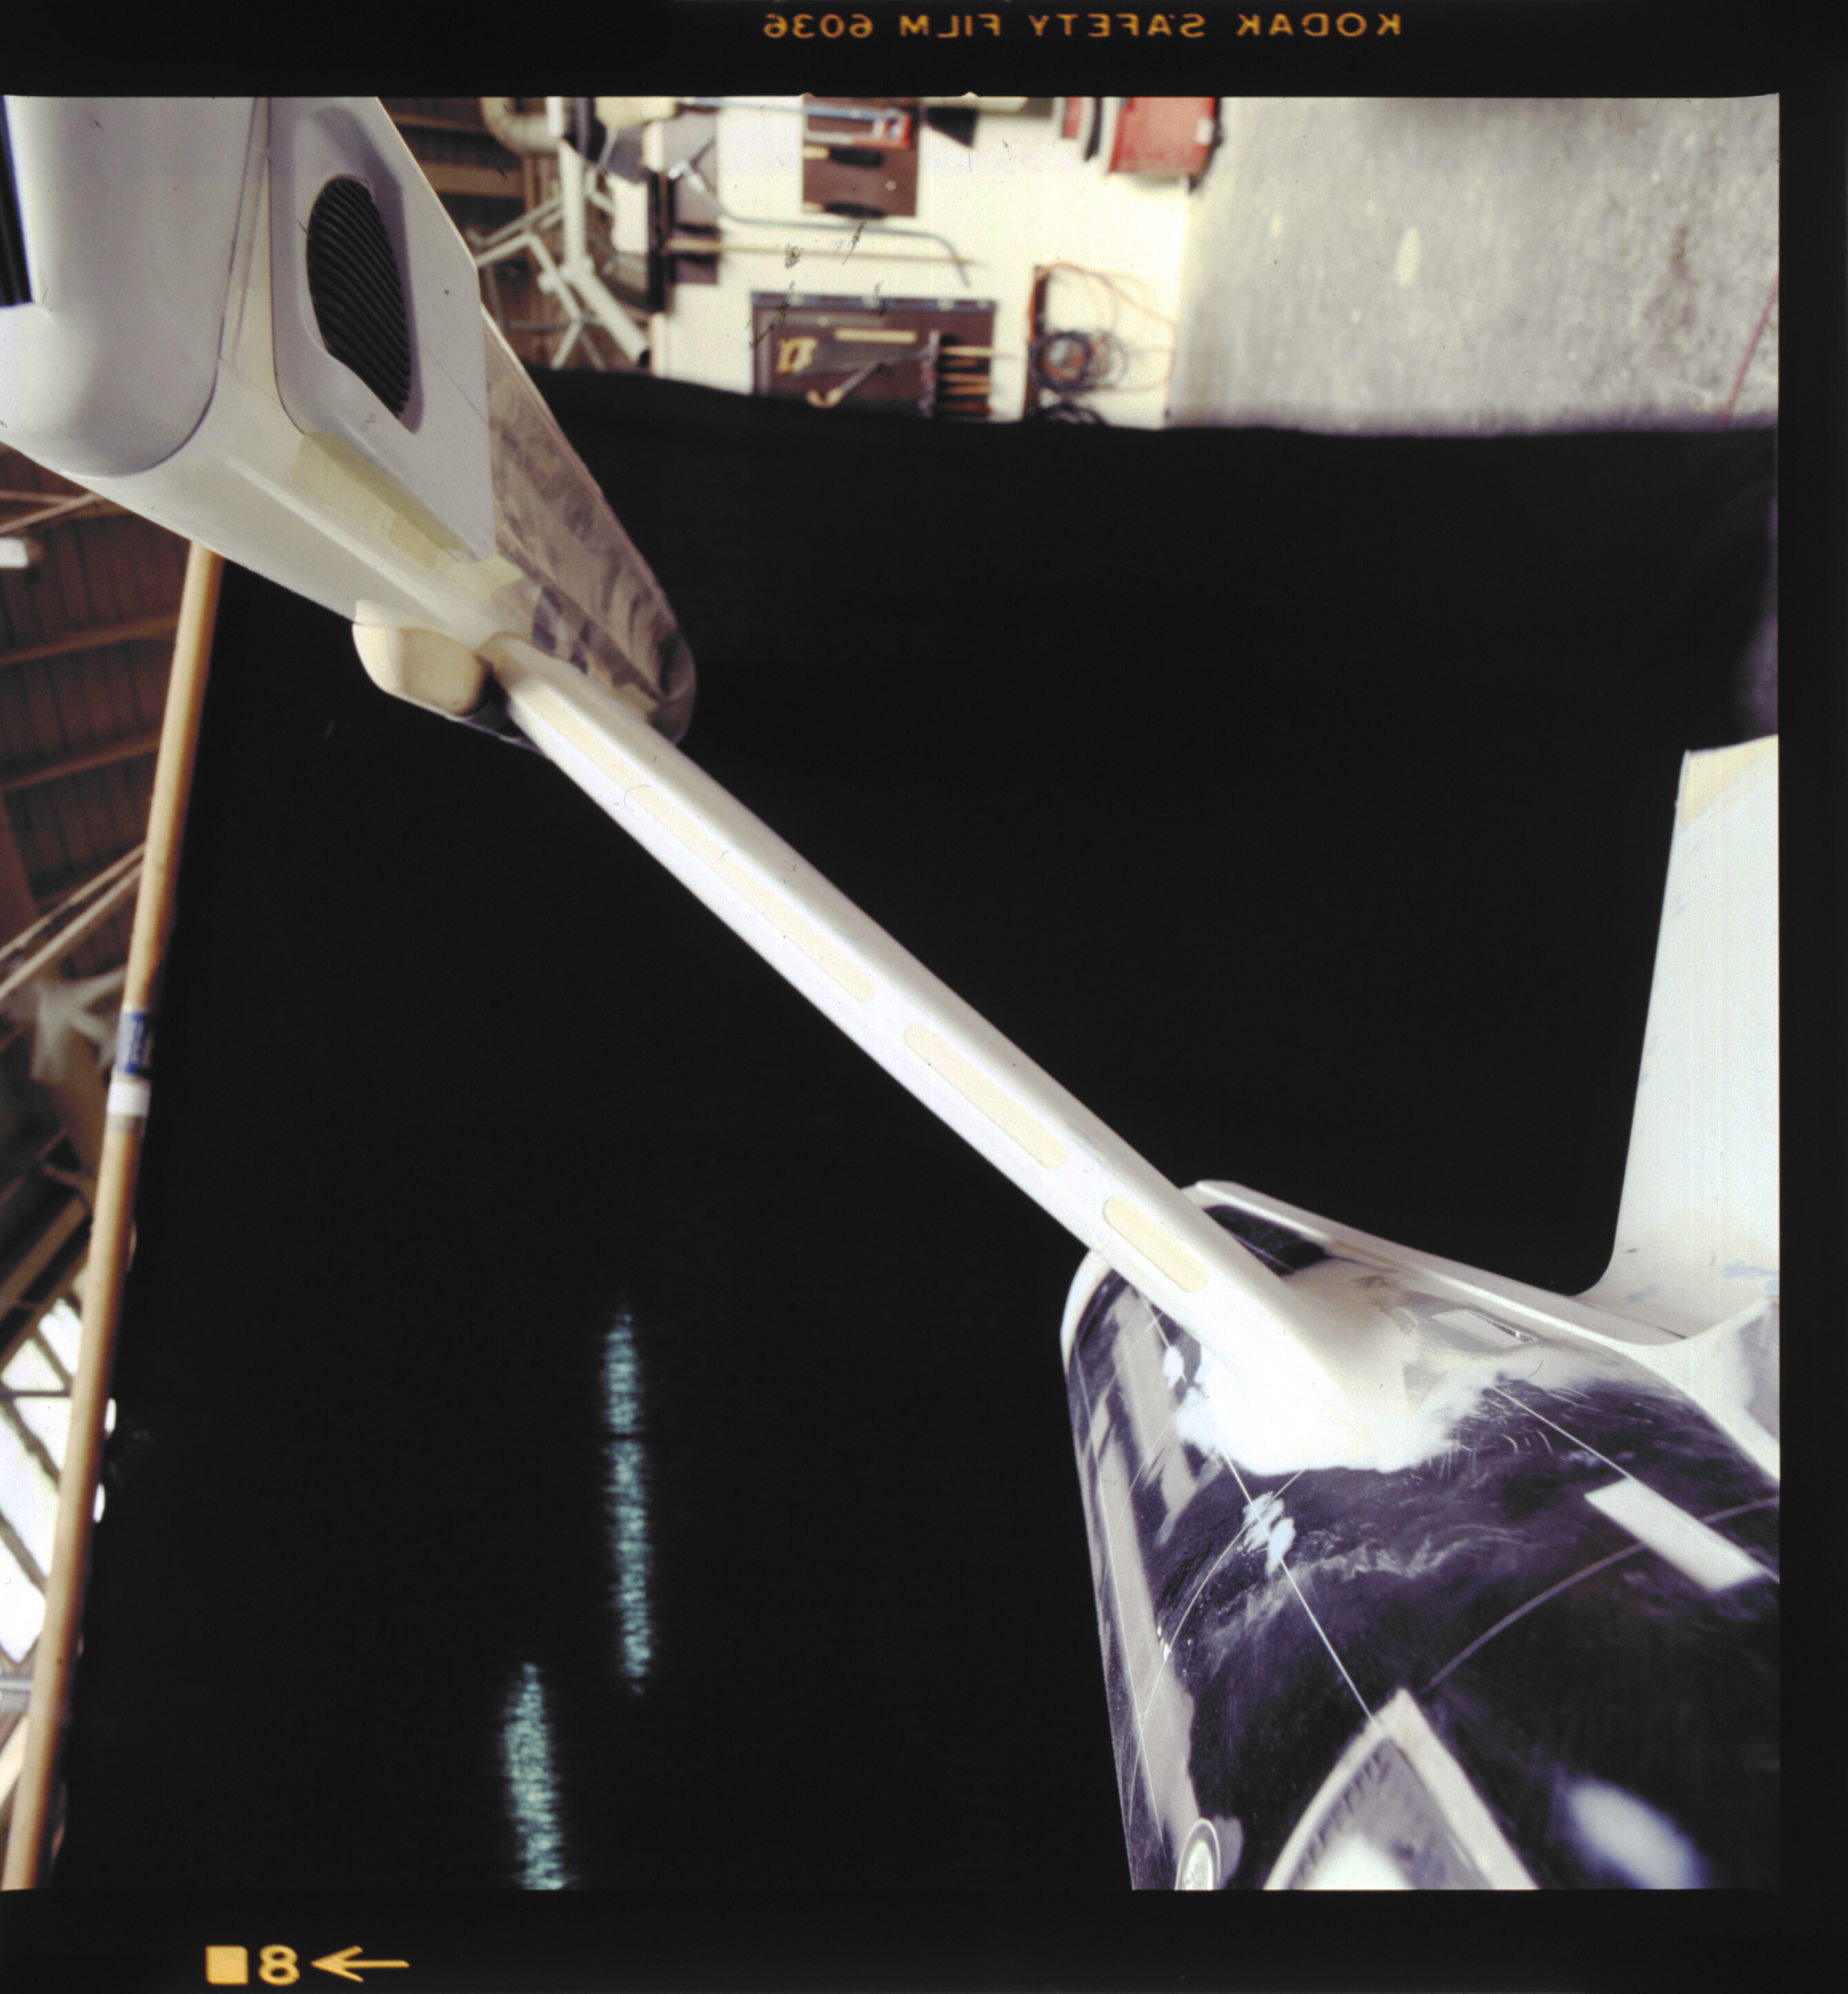
Detail of the Enterprise filming
miniature’s starboard warp nacelle
and strut under construction at
Magicam model shop in 1978.
(Image: Courtesy Richard Taylor)
Taylor: Well the answer is “Method A”. I did everything I could to make the nacelles more rectilinear and not circular. That was one of the things about the original television Enterprise, was that the nacelles to me looked like cigar tubes. I mean that whole circular, rounded look led me to really push to get the thing more linear and not circular, even in the cross-section. So the answer again is “Method A.
Gore: Gotcha. Ok, great.
That definitely helps because that’s one of the thing where after I got into this, and moved into some of the 3D modeling stages of this thing, I’m like “wait a minute, this doesn’t entirely jive.” Because in order to get it to work you have to sort of flatten it on the top to make it fit both vertically and horizontally. Particularly back in the aft area where it tapers down the angled end-piece. The width of the start of that taper, when it is more of a cylinder, is not the same as its height (it is wider).
So I was… “how does this work?”
I know they didn’t jump through hoops in order to fabricate the pieces of this model, just in order to arrive at this arbitrary “almost” cylinder of a shape.
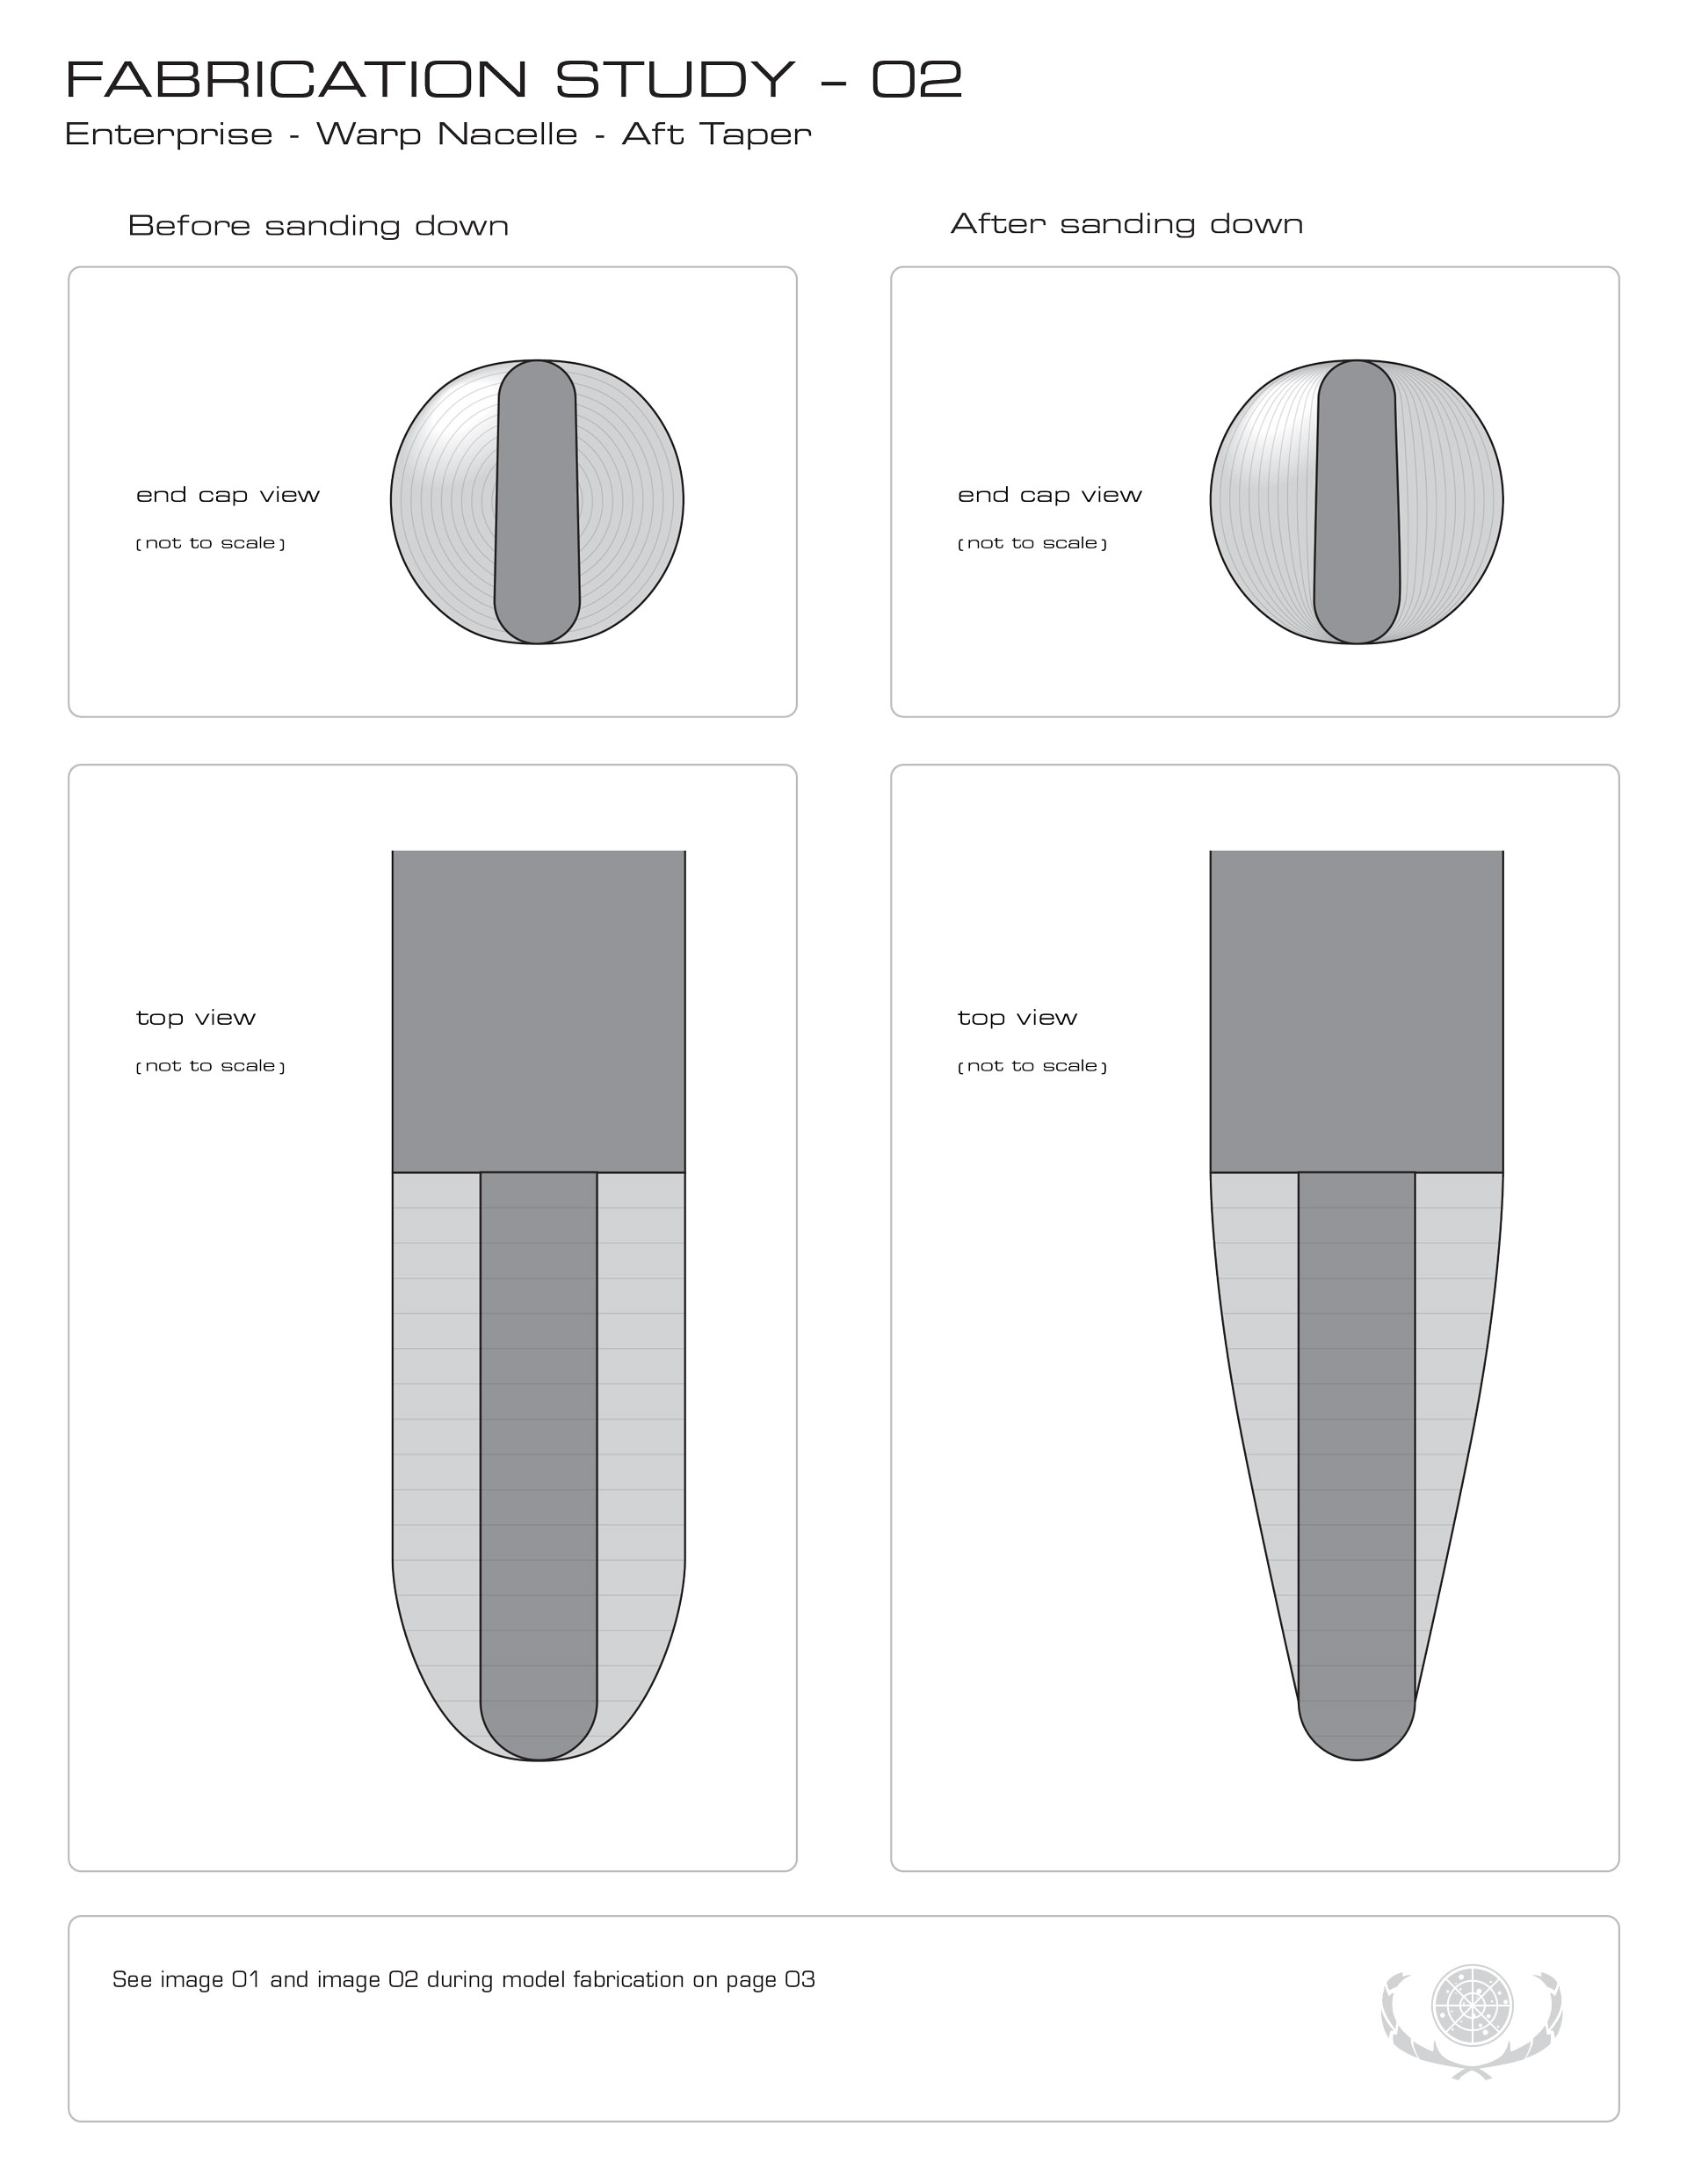
Fabrication Study 02. Click to enlarge. (Third Wave Design)
So I’m glad to finally hear this. Because it answers a lot of questions that I have had as far as reconstructing how this thing was designed and built.
Taylor: Yes.
Gore: Also, in page two of the material I sent you, it refers to the area going from that basic cylinder body, which is kind of obscured by the larger trapezoidal core section, back to that very vertical, narrow tapered end that is then sliced at a 40º angle…
Taylor: Yes. Are you talking about in the illustrations where you have the two down views and two end views?
Gore: Correct.
Taylor: Well how the nose of the nacelle vs. the way it is shaped at the back, is that the question you are asking?
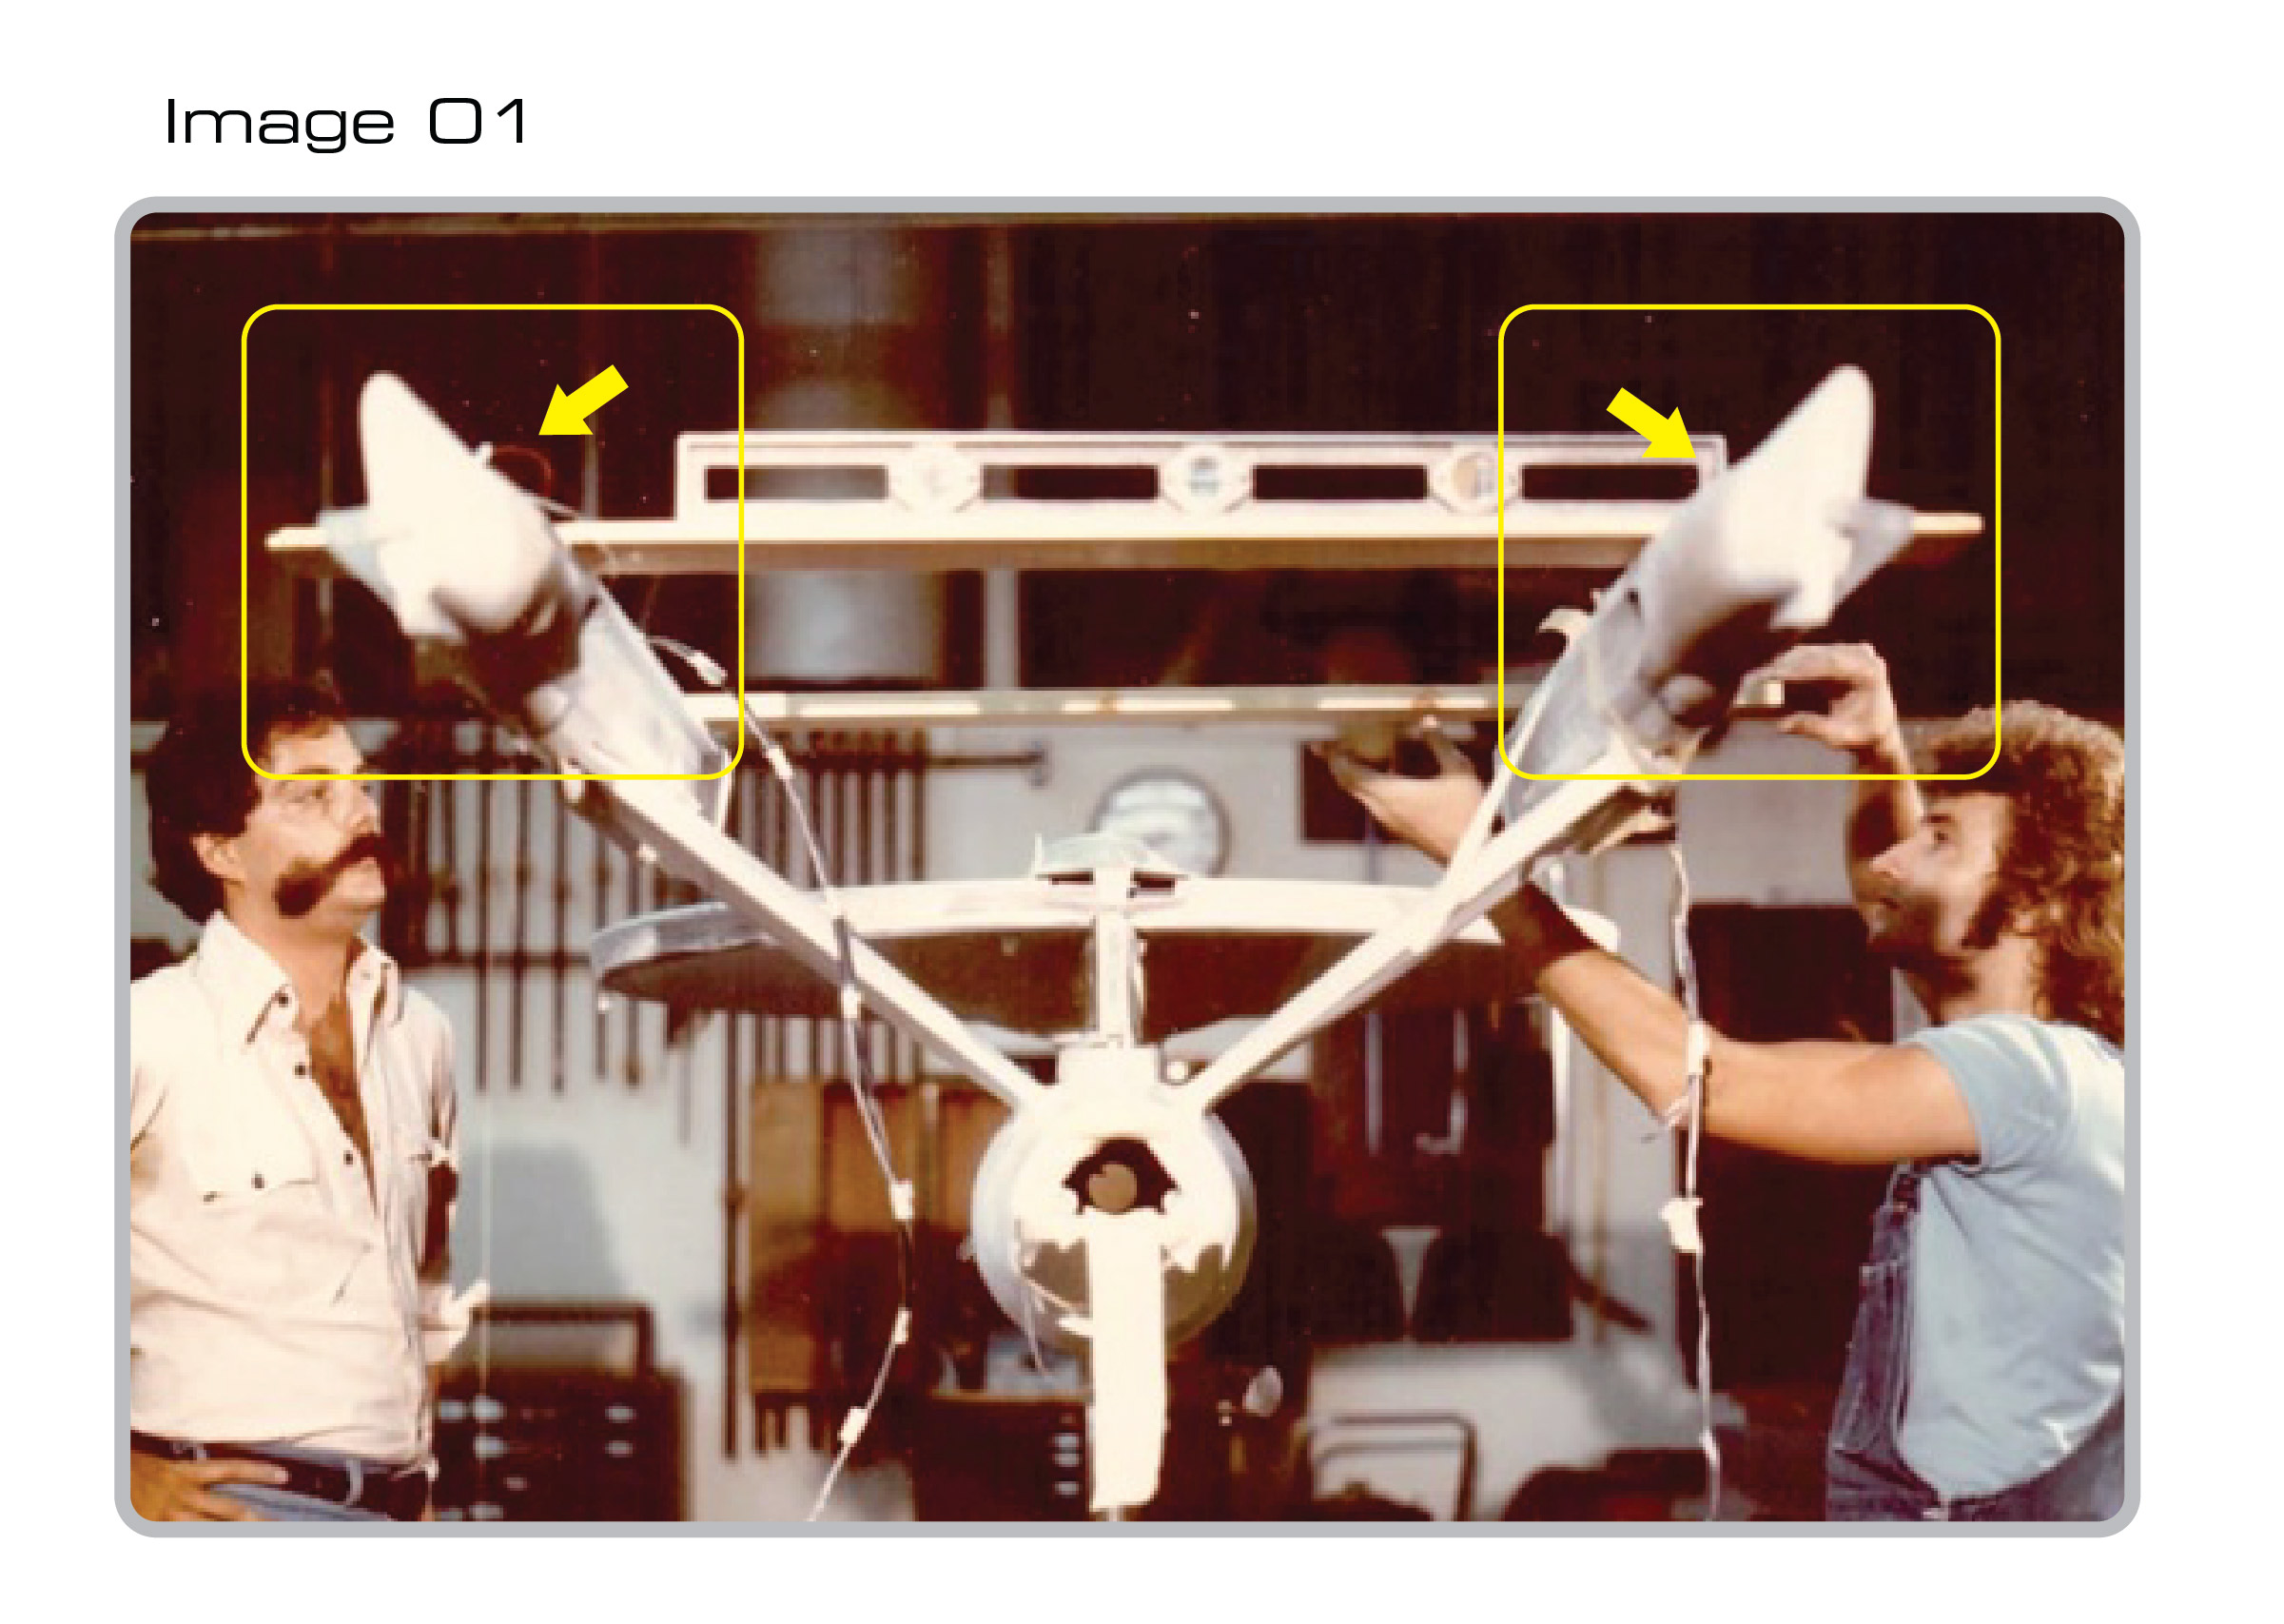
Fabrication Study image 01.
(Third Wave Design,
Image: Courtesy Richard Taylor)
Gore: I was more asking about, and trying to workout, how the taper at the back was actually fabricated. Going from the quasi-cylinder down to that vertical angled section. Was that built up by applying Bondo as a cylinder made up of some type of body filler material, and then sanded down to make that transition from the circle down to the vertical elongated shape (if you are looking at the end-view)… does that make sense?
Taylor: Yes it does. How that was fabricated you are going to have to ask Jim (Dow) about that. Because there were a lot of different elements that were in those nacelles. You know there were metal parts, that were anodized or coated with the blue dye, that you included in your reference material.
Gore: Yes, the part about the Dykem marking fluid being used where the light spills out. Yeah I had a whole series of questions about that and how you arrived at the color of the glowing parts of the warp engine.
Taylor: Right. So how they arrived at that in order fabricate it, I don’t exactly remember. I know they made molds for almost everything. So almost everything curvilinear was made of molded or cast material.
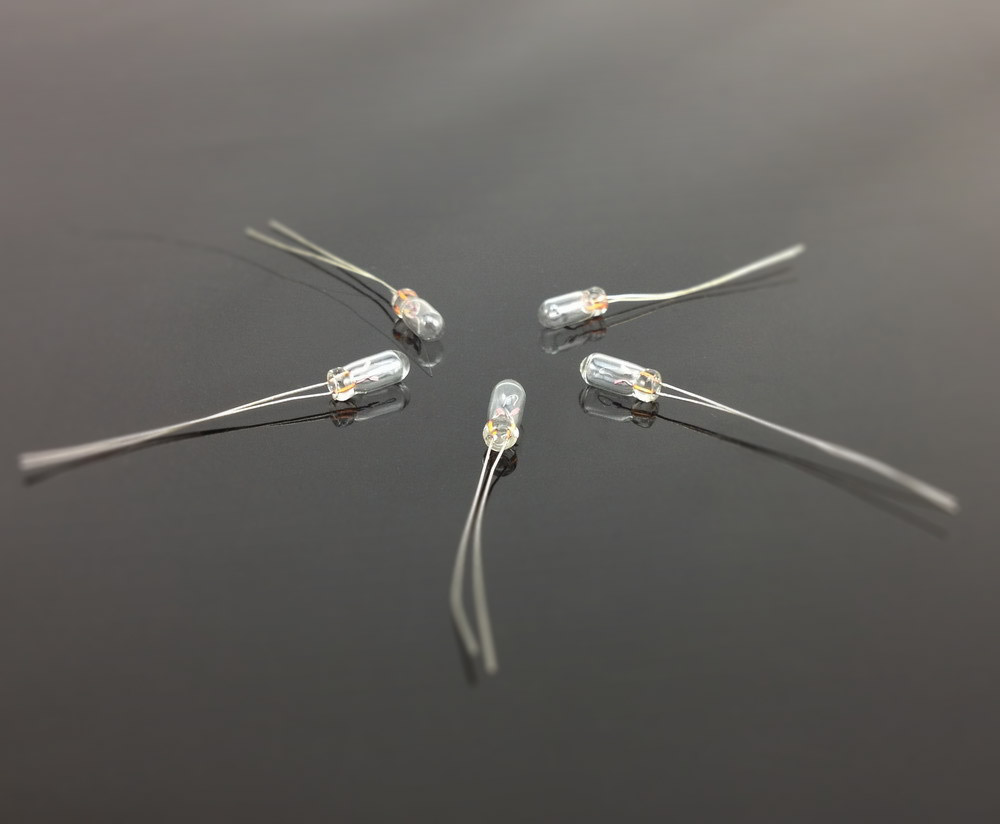
3mm clear 12V grain-of-wheat bulbs.
Because there was so much internal wiring in the model, that was one of the most daunting parts of it. That you would get this built and you don’t have access to the inside. If you blow out a grain-of-wheat bulb, which was the only kind of small light that we had at the time. There were no LEDs. So we had grain-of-wheat bulbs, which are tiny, tiny incandescent bulbs.
And we had of course the larger fluorescent tubing built into it to illuminate all of the windows around the perimeter. Inside the window we had transparencies, I don’t know if you know that, but inside the windows around the saucer were color transparencies of corridors and other architectural set interiors.
Gore: Yes.
Taylor: There was backlit opal Plexiglass that had 35mm pictures that were cut down to fit in over the opal glass. So there were pictures of Mickey Mouse and some of the special effects crew and all kinds of images we put inside those windows for a laugh.
And then there’s 1/8th inch plexiglass that is the actual window itself. That was so if the camera came in close to the saucer it would see imagery inside that would change perspective as it moved by.
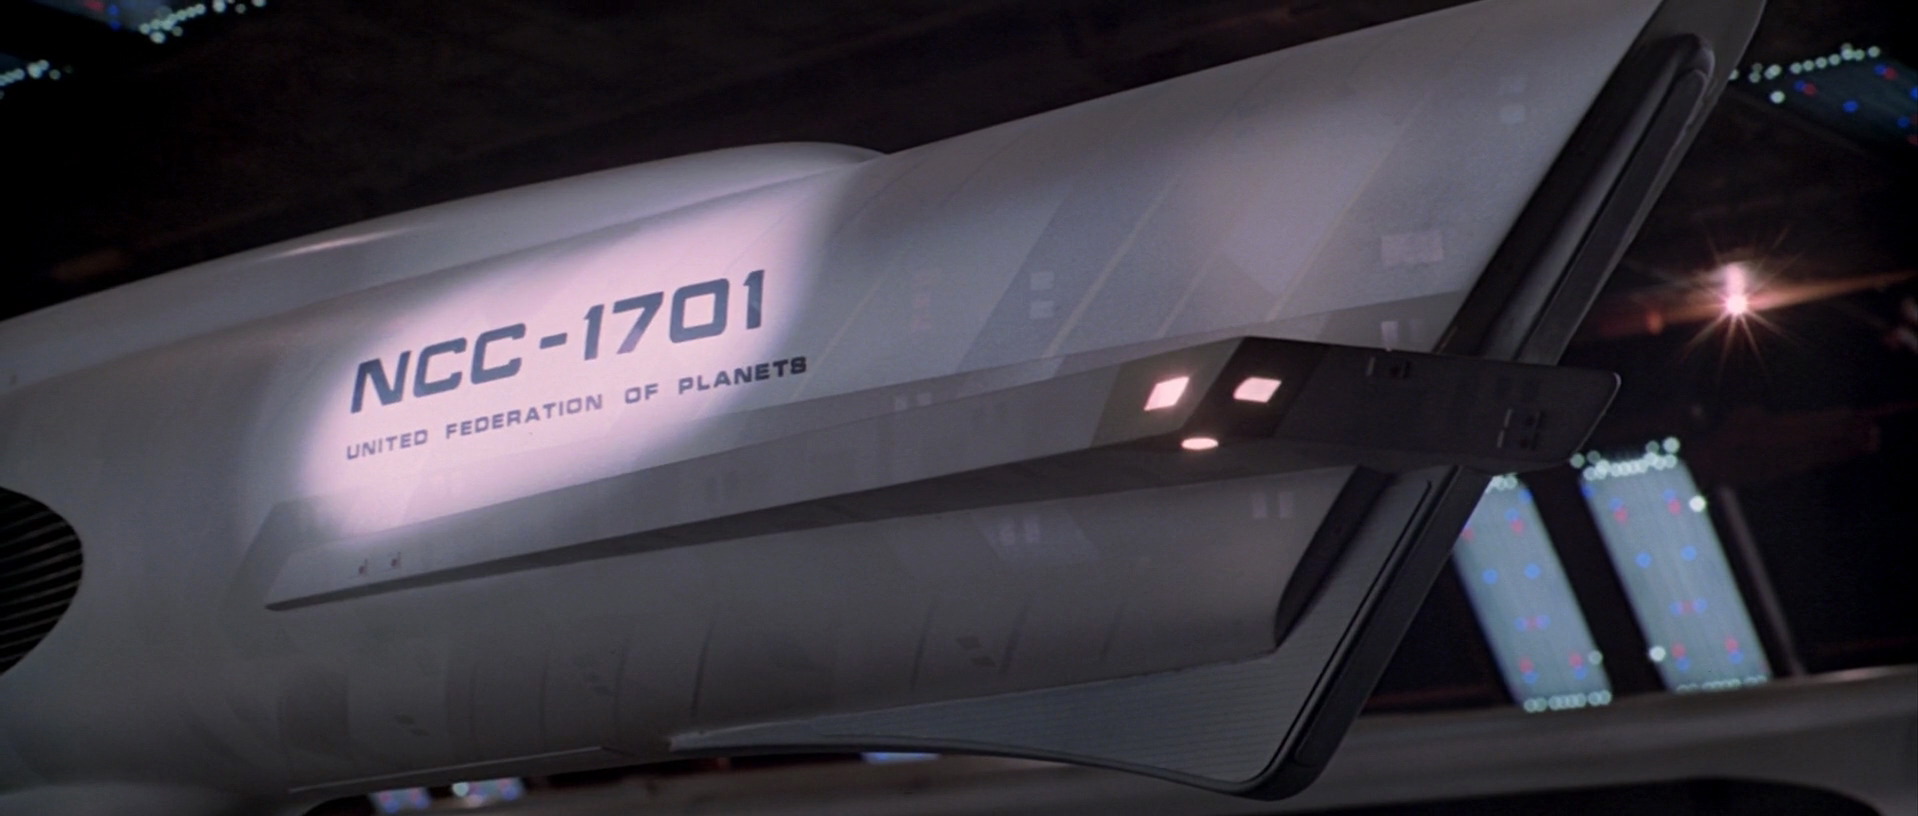
Scene from Star Trek: The Motion Picture, showing the port warp nacelle,
with the aft RCS pylon/wing and
ship’s registry number lit-up.
So that was part of the design of how we built all the lighting into the model.
We had to think about what happens if any of the lights burned out or failed.
How to open up the model in order to get to a fix was real issue with the technology that existed at that time. The lighting umbilical that came out of the armature had maybe 25 circuits for say the ion engines, or the display lights, or the nacelles, or the maneuvering thrusters.
Gore: Yes, the RCS thrusters.
Taylor: Right. Which were built at key places on the model to maneuver it at slow speeds. Unfortunately that effect was never used in the shots of the Enterprise maneuvering out of the dry dock. My idea was that you would sort of see those going “chit… chit… chit…” to gently maneuver the thing out of the dry dock.
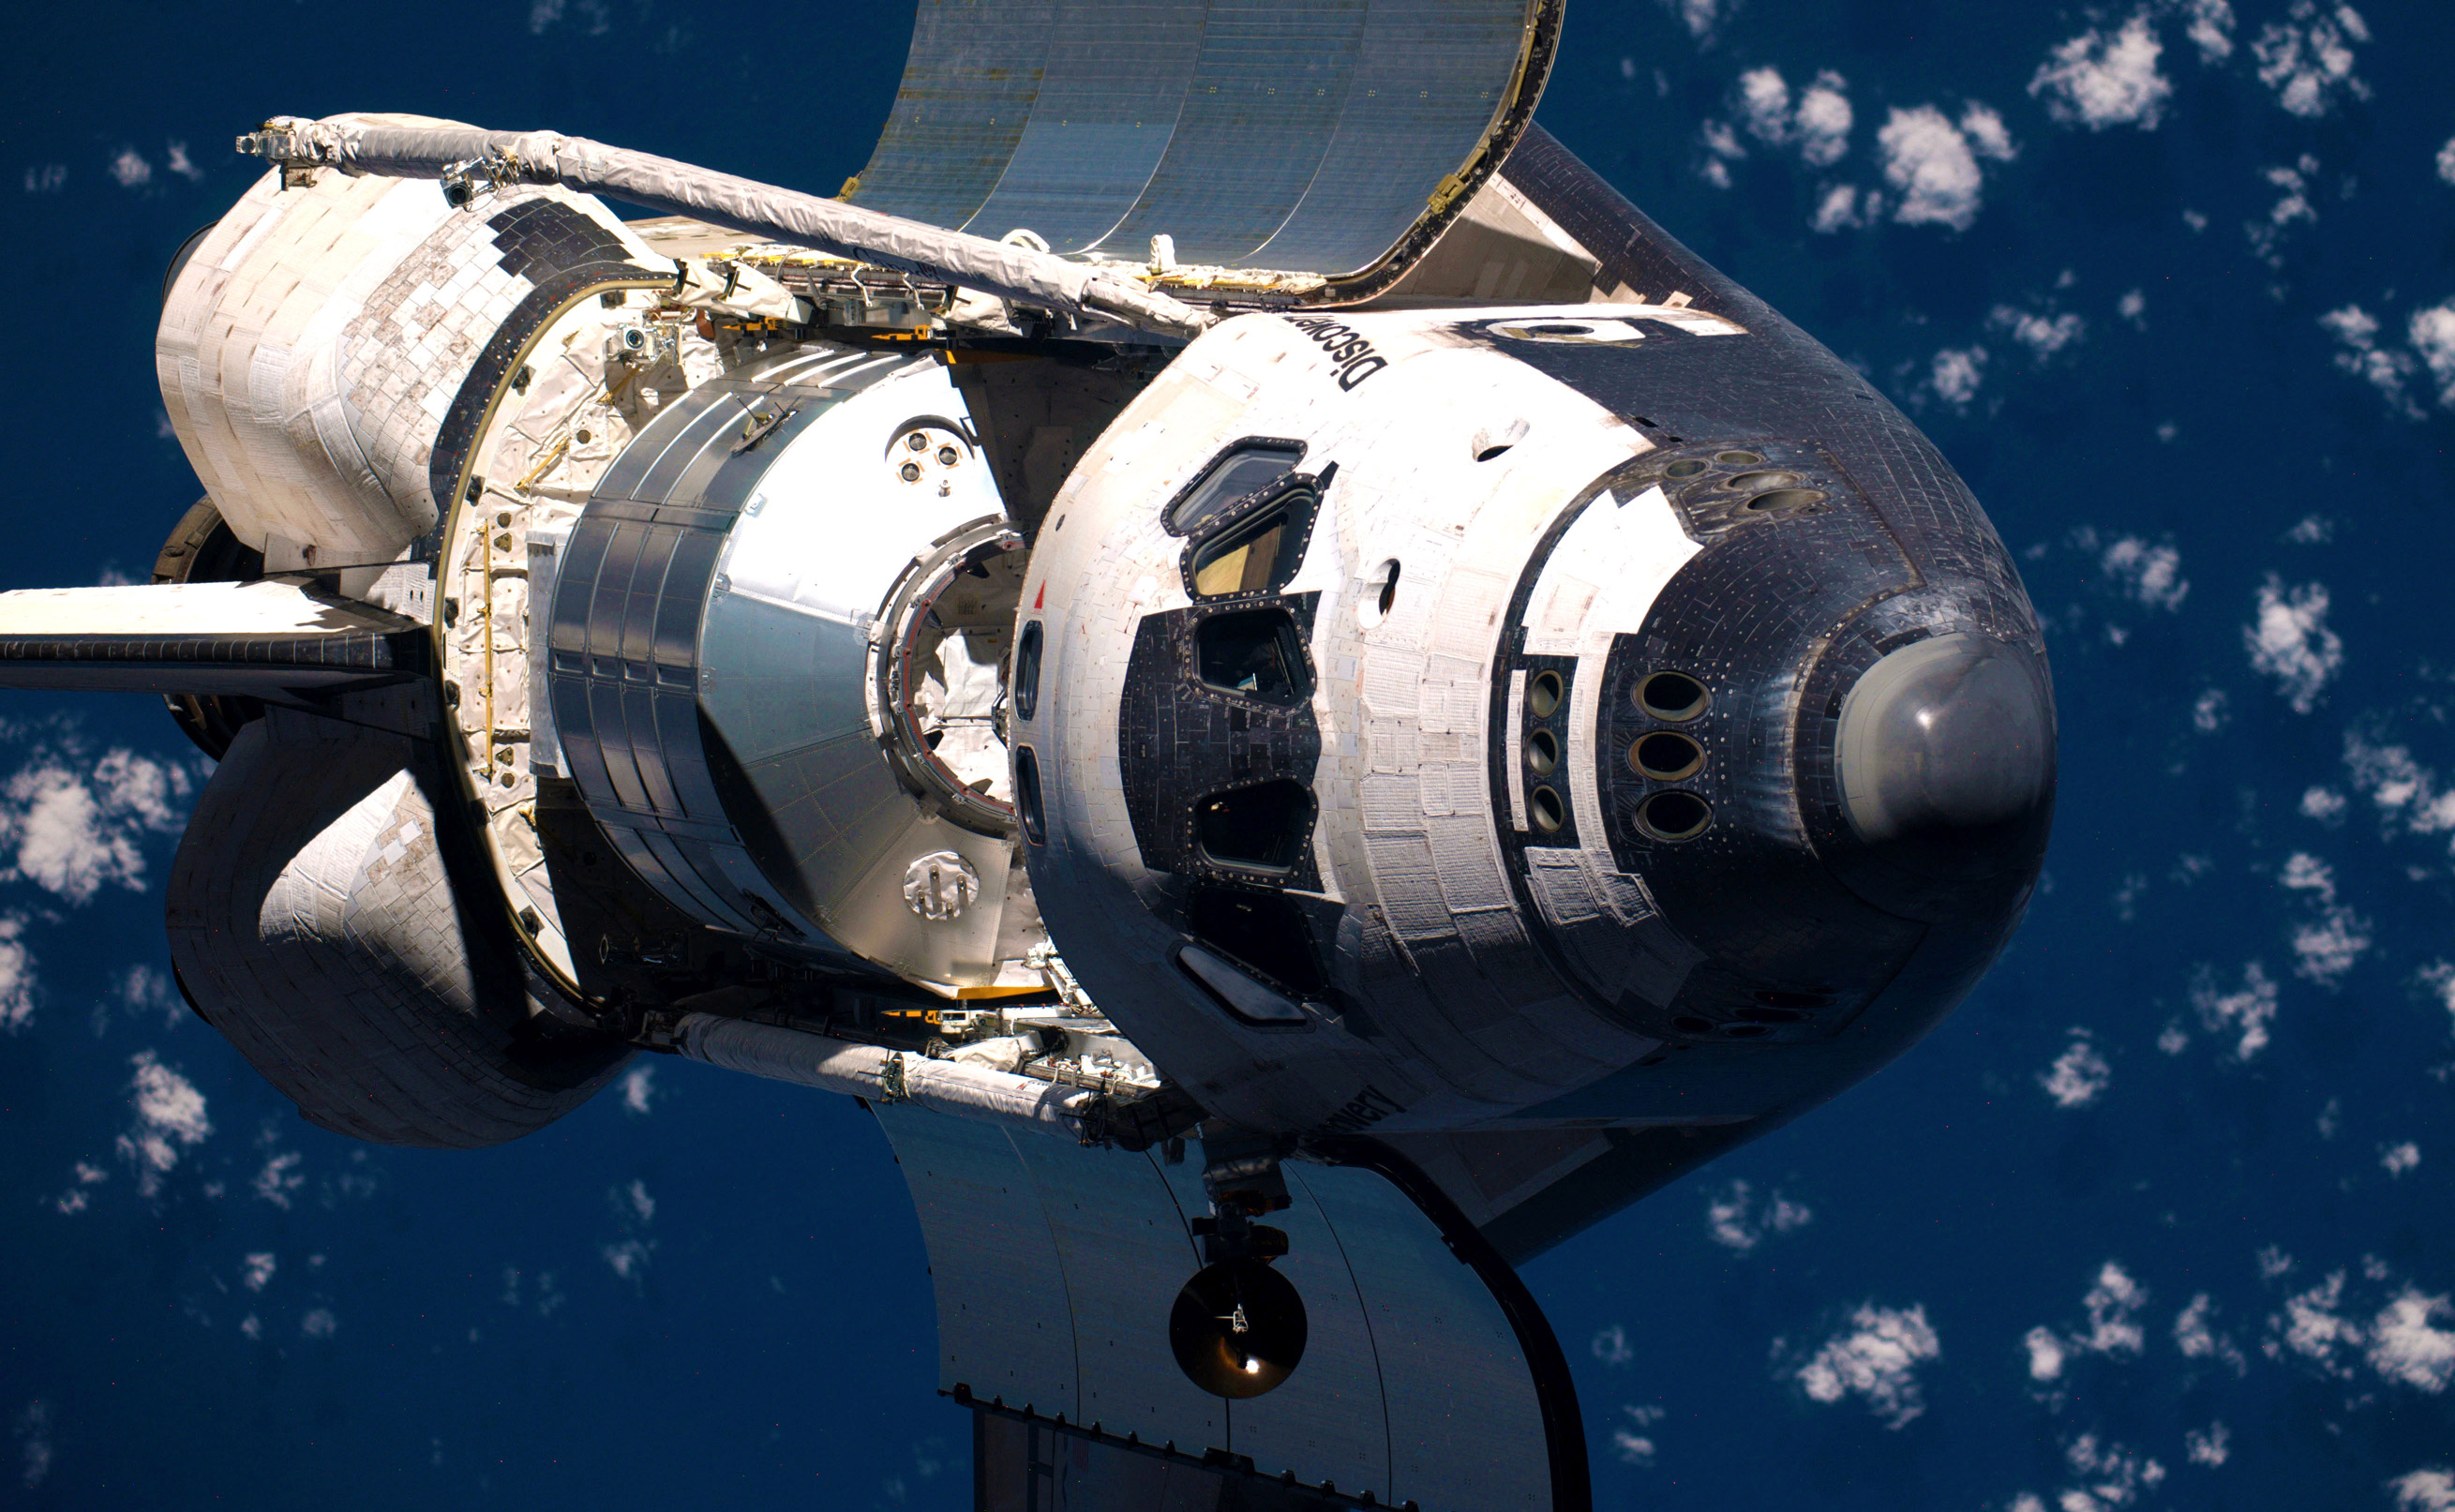
Front of the Space Shuttle Discovery
approaching the ISS, showing its
forward cluster of RCS motor nozzles
between its nose and windshield.
(Image: Courtesy NASA)
Gore: Yes, like the RCS thrusters that are on the shuttle, the actual Space Shuttle that is, and you could see them of course even back on the Apollo missions and earlier as well. They are like those small little clusters of jets for attitude control.
Taylor: Correct. So they are around the perimeter. They are at the quarter angles of the saucer on the top and bottom, and they are on the horizontal fins on the tail of the nacelles.
Gore: Yeah. Those narrow horizontal wing pieces at the back. I have always referred to it as that… the RCS wing. Some people refer to it as the “intercooler“. Which was in reference to a set of fins that were on the top of the original television series engines towards the back.
Taylor: Well you are more correct. To me it was basically something that, again looked good as far as the design, to give the nacelles another shape that looked good from a down view. But also for the side-view or 3/4-view it would give some visual detail. It allowed for a place to put those thrusters and it also kind of tied into the whole surfboard motif at the tail of the nacelles.
Gore: Gotcha.
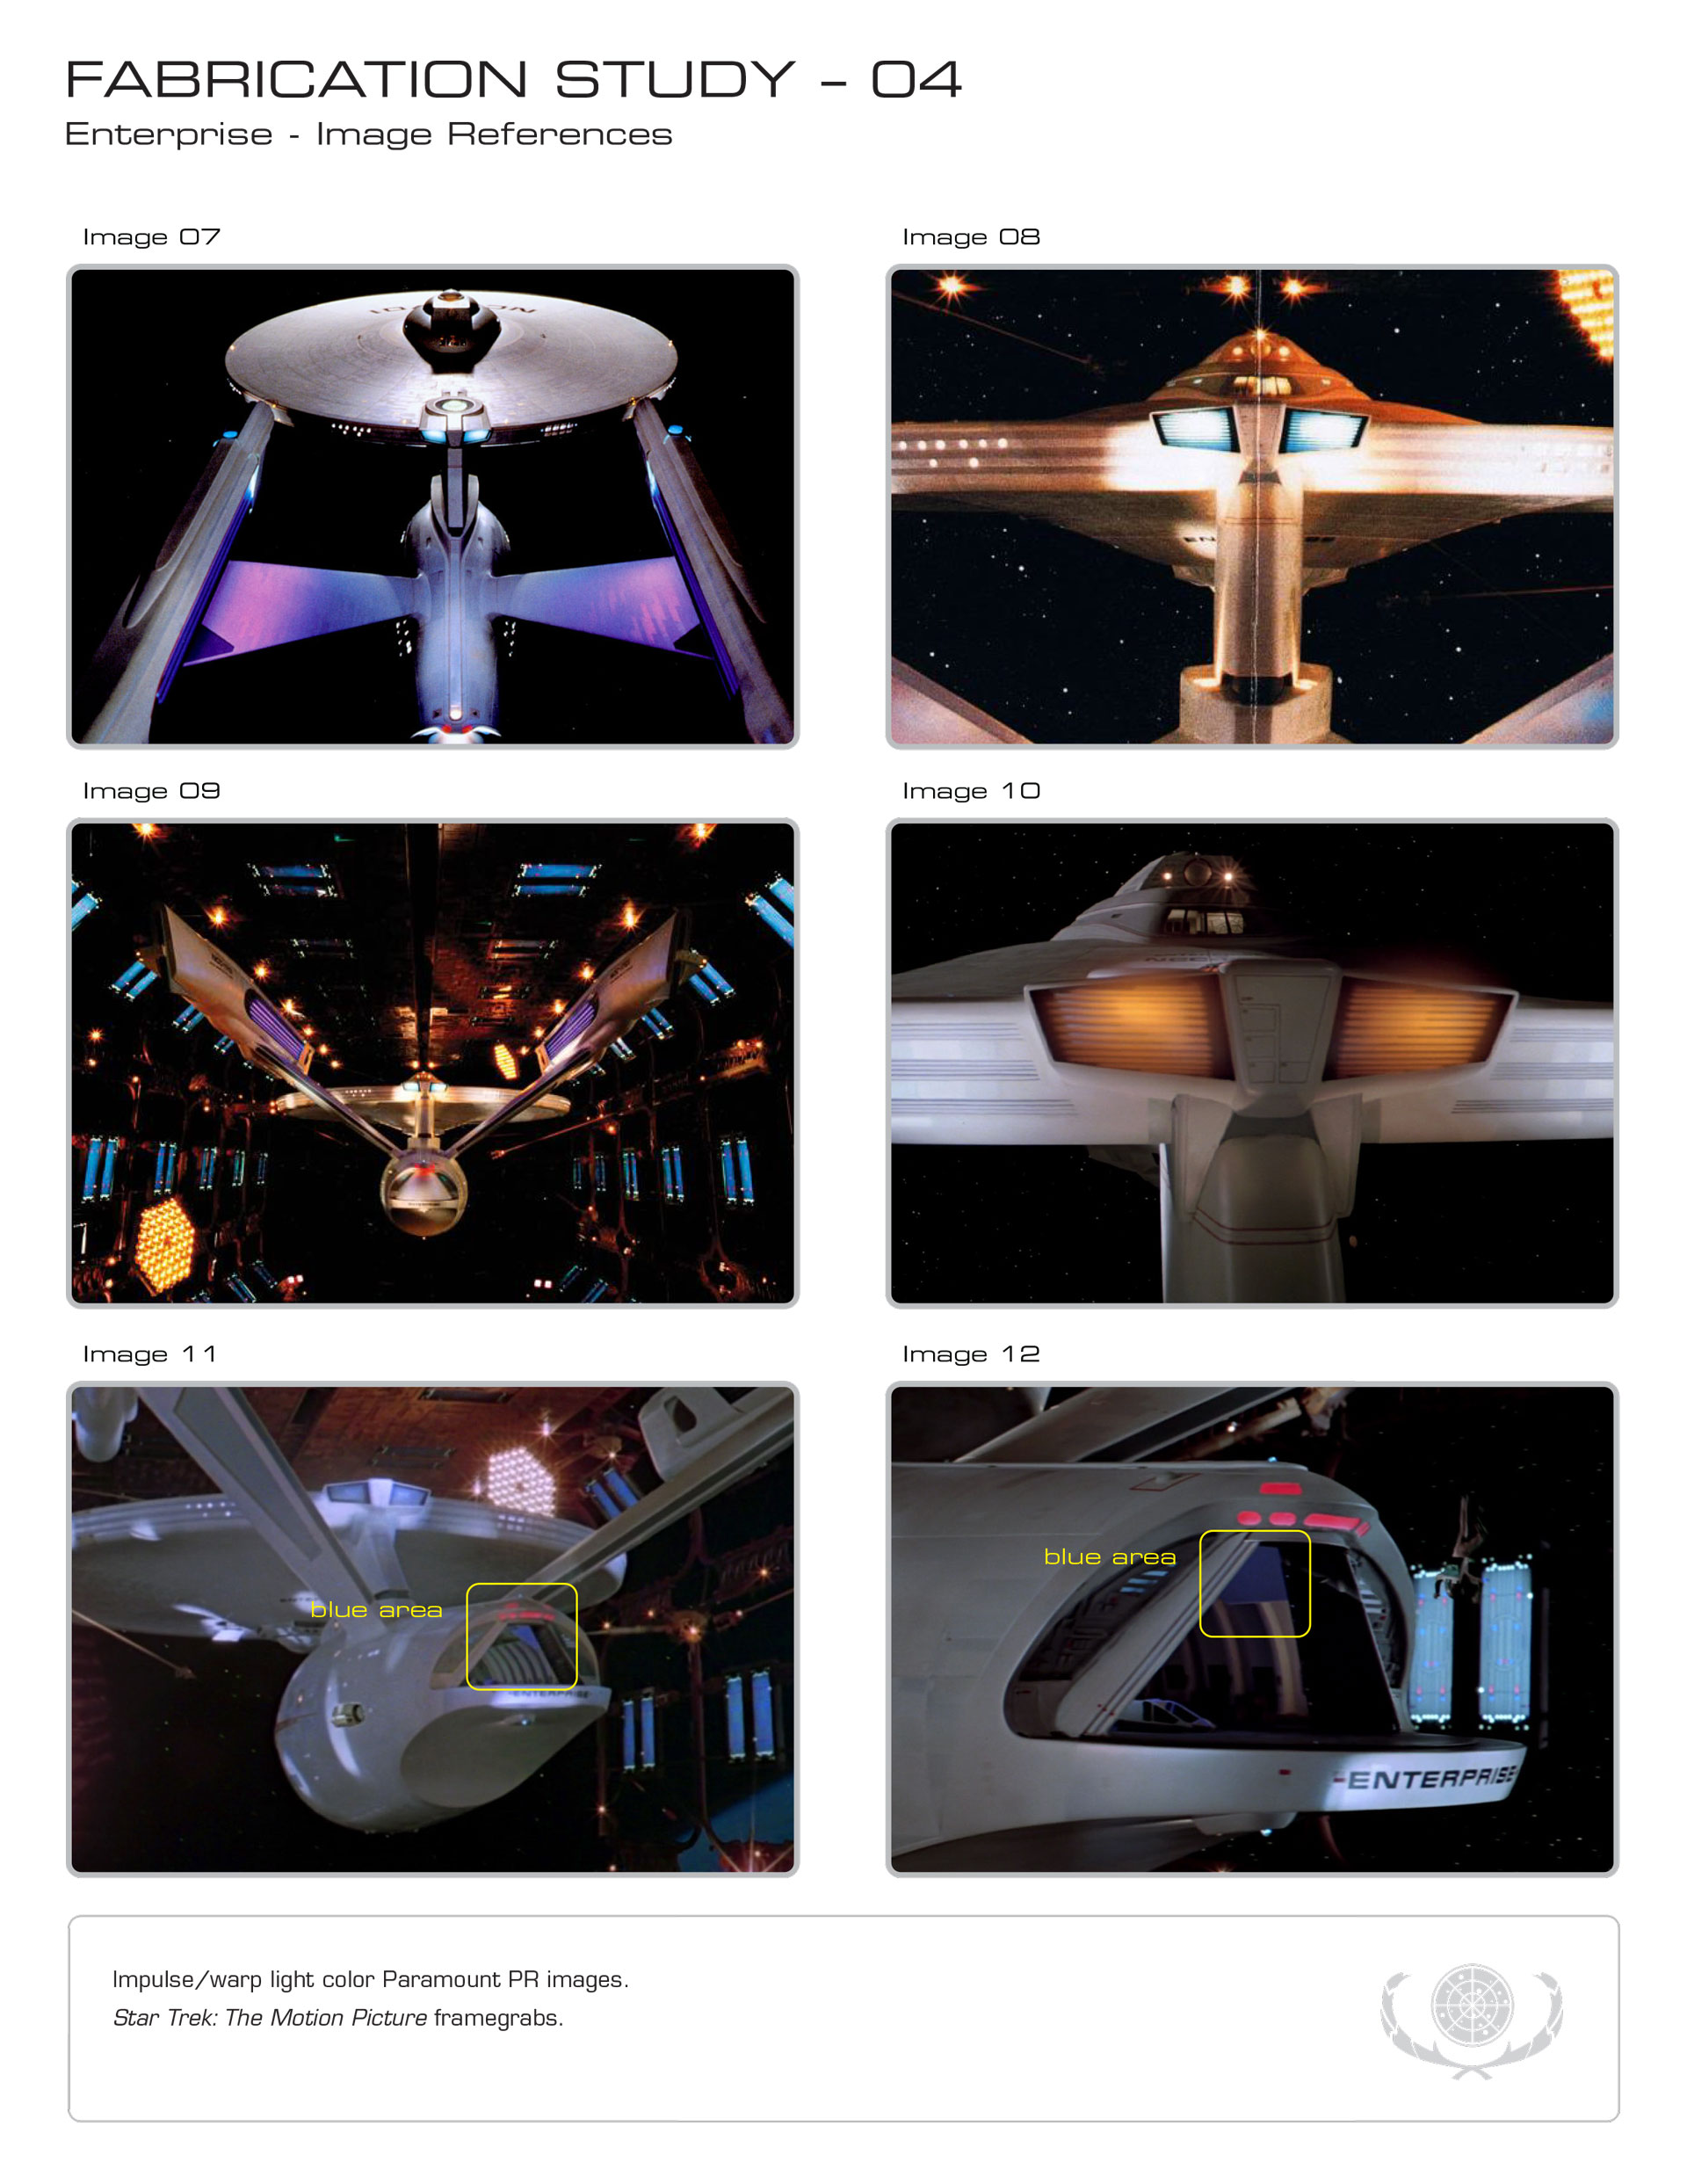
Fabrication Study 04. Click to enlarge.
(Third Wave Design)
You had mentioned that you had used grain-of-wheat lights for a lot of the small little lights. And then the fluorescents as the overall light source behind the transparencies and the little light-boxes in the windows. And also in the ion engine, or impulse engine, housing at the back of the saucer. One of the questions I had was that in a lot to the publicity shots, and I believe some that were also taken as test footage that you guys shot before it was turned over to Doug Trumbull‘s team, it appeared that they had a white/blue color in them, in page 04 of that document I sent you, you can see that in the first four photographs there. The first three show them with the blue/white color, and in the fourth one from the actual film it was an orange/yellow light.
Was that made so it could be changed on the fly, and designed as such into the lighting?
Or was that a one-time change that was made in the coloring of the lighting gel behind that grille piece?
Taylor: It was not something that designed to be changed on the fly and built into the lighting. In my original design it was intended to be bluish, like image 07 on the 04 page. That’s the way it was initially designed. So I assume Trumbull made the decision to change that color, and they would have had to get in there and pull those lenses out. Because the actual lenses there on those ion engines were removable so the color could be changed.
Gore: Got it. I had actually found online somewhere that somebody had run down that actual grille piece. That is was a cast or etched metal piece I believe.
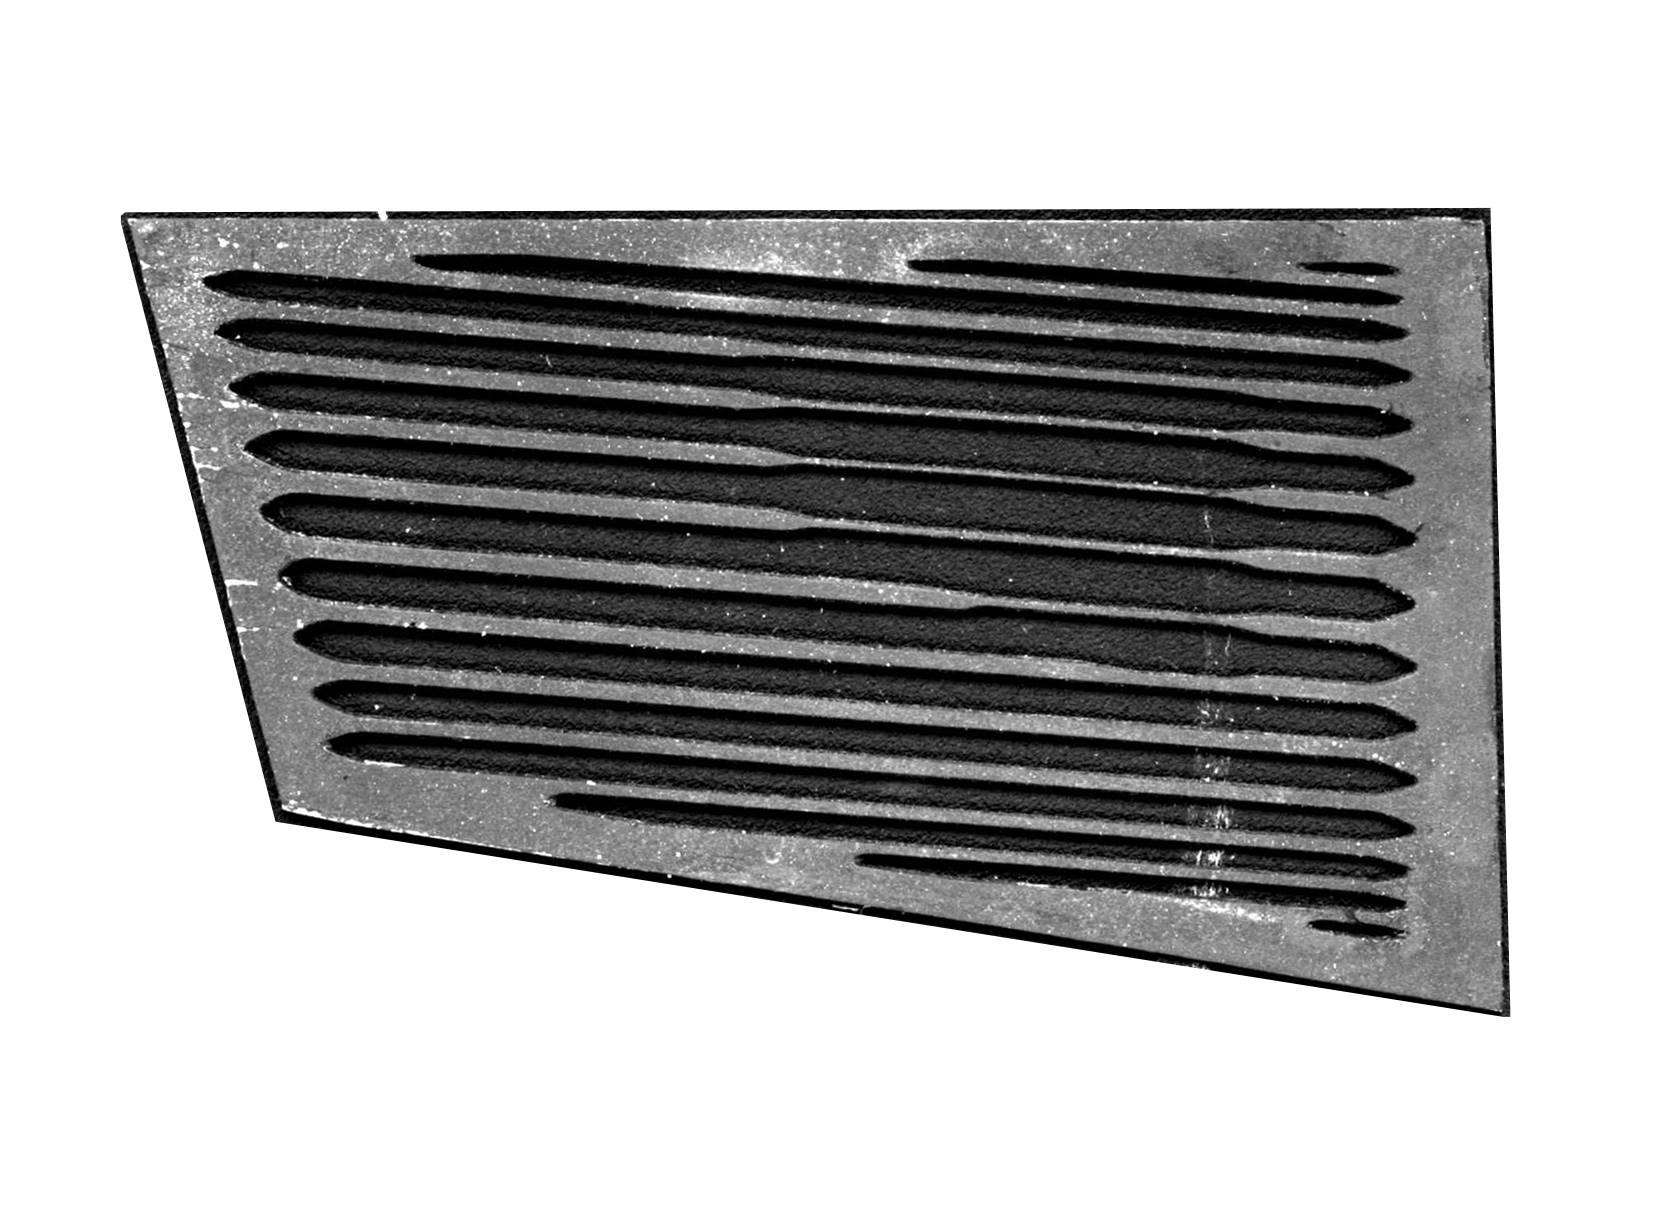
Detailed image of one of the
metal impulse engine grille inserts
for the filming miniature.
Taylor: Yeah.
Gore: And there is a really, really high-resolution close-up detail of that, which was really fascinating to me. But ok, so it was a one-time change that was done after it was delivered from Magicam to EEG.
Taylor: Yes.
Gore: Getting back to the whole “warp glow” color issue, it was reveled in an interview with you, or maybe it was Jim Dow, that the actual color of the glowing warp grille side of the nacelles was produced by utilizing Dykem marking fluid. Was that just applied to the overall grille piece, including whatever sort of clear plexiglass or plastic gel that was in there? Or was that just applied to the inside of the thing?

Fabrication Study 07. Click to enlarge.
(Third Wave Design)
Because at the Christie’s Auction house photos, one of which is image 21 on page 07 in the reference material I sent you, you can clearly see that the non-lit portions of it have a purple, or a purple-violet, cast to it.
Is that just an artifact of the Dykem marking fluid on top of a dark metal?
Or was that outside piece re-painted by ILM at a later date (when they took on the effects for Star Trek II: The Wrath of Khan)…?
Basically how did all that color application work?
I ask because that has lead to the whole controversy in modeling circles about whether the warp grilles light up blue, or if they light up violet. It seems depending on the PR shot, or what was in the film, or the various color-correcting and white balancing used in all of those different images, it can give you radically different results.
Taylor: Yes. Well the color of the metallic… what are you calling them, grilles?
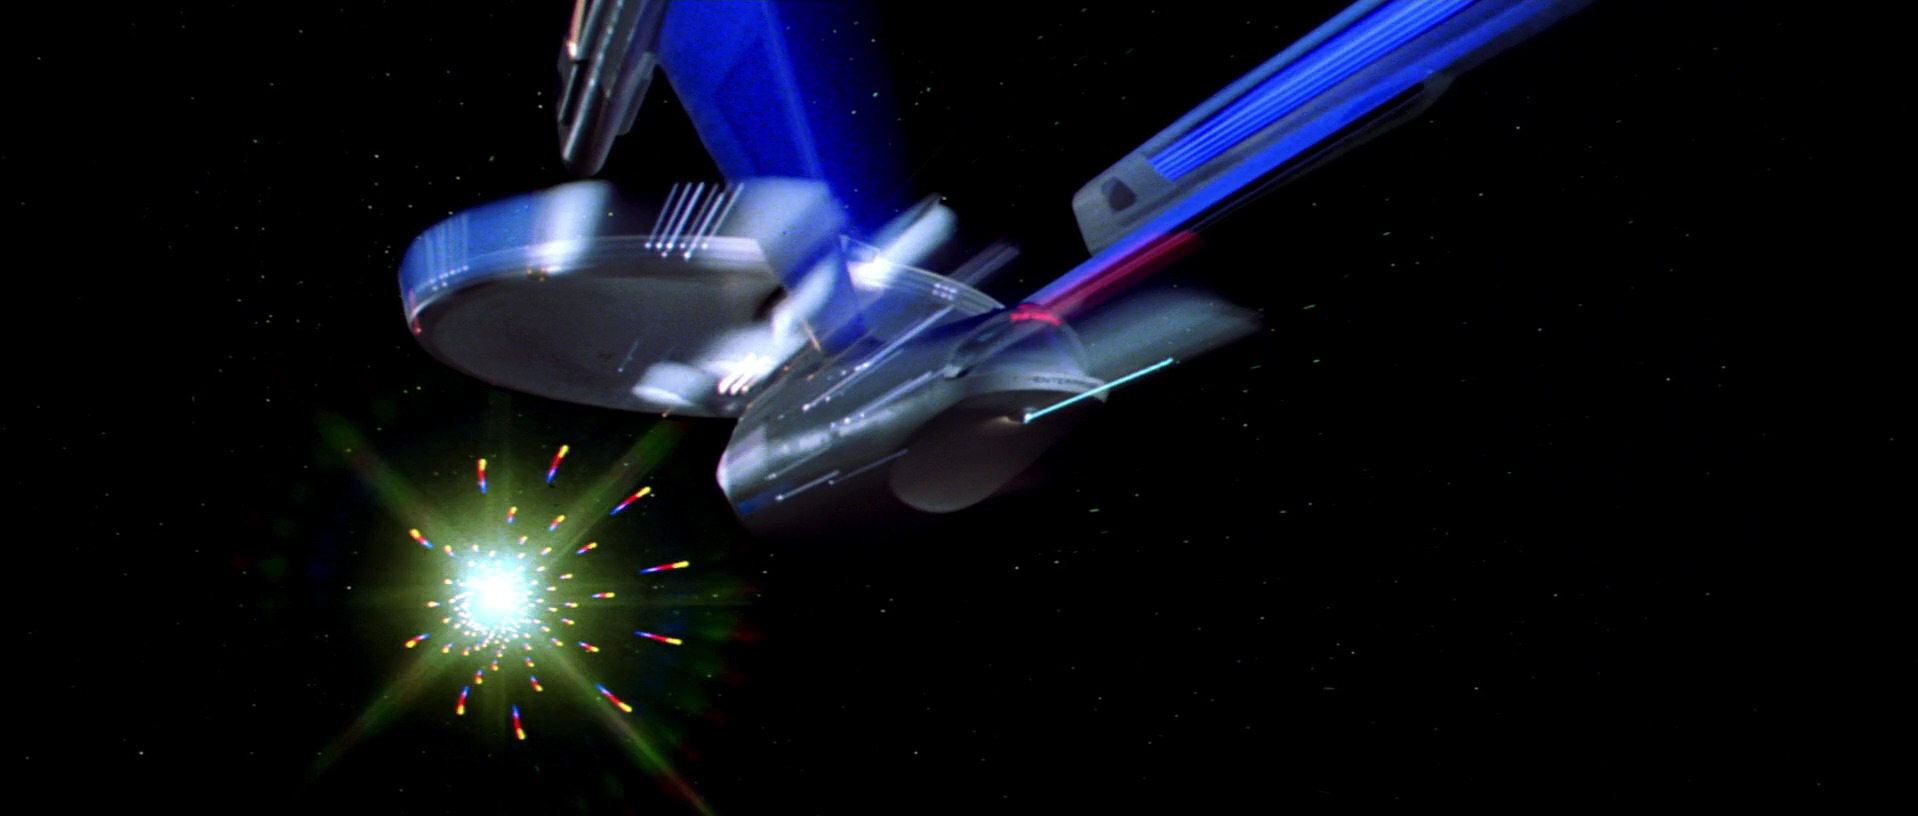
Scene from Star Trek: The Motion Picture,
of the final shot of the Enterprise
as it goes to warp speed.
Gore: Yeah I just call them a grille.
Taylor: Well in my mind I was trying to represent them as large magnets.
Gore: Yeah, got ya.
Taylor: And so it is the Dykem that was applied to the polished aluminum to give them that bluish color. And you know what Dykem looks like on metal. You’ve seen it before, so that’s how they were built into the model. So that bluish color was on the actual metal.
The color of the light that came out, of course was a gel or it could have been white light that was colored in shooting that light pass with motion control where a different color gel was on the camera for that pass. That technique would allow it to be made any color. Remember every light pass of individual light systems on the Enterprise could be shot as a separate motion control pass. I wanted the color that glowed from the nacelles to be blue/violet.

Early 1979 storyboard/concept
sketch of the Enterprise VIP/Officer’s
lounge by Andrew Probert, with
the warp effect in the background.
(Image: Courtesy Andrew Probert)
The initial idea I had was that we were actually going to create and effect between the nacelles when they were in operation. I was going to add a glowing oscillating force-field effect to show the idea that they were creating a distortion in space. It was to be an effect were we could change the exposure from frame to frame to make a pulsing light effect.
You would only have that effect when the Enterprise was at light-speed. It would come on as it transitioned to light-speed. All other propulsion of the Enterprise would be from either the ion engines or the maneuvering thrusters.
So all slow movement… in my initial storyboards of the Enterprise moving through V’ger‘s interior was going to show the Enterprise being scanned and analyzed as V’ger tried to figure out what the Enterprise was since it was more complex than any other piece of space junk it had come into contact with during it’s voyage to find the home of the Voyager space craft. For one thing there were living organisms inside it. You have seen some of those conceptual drawings.
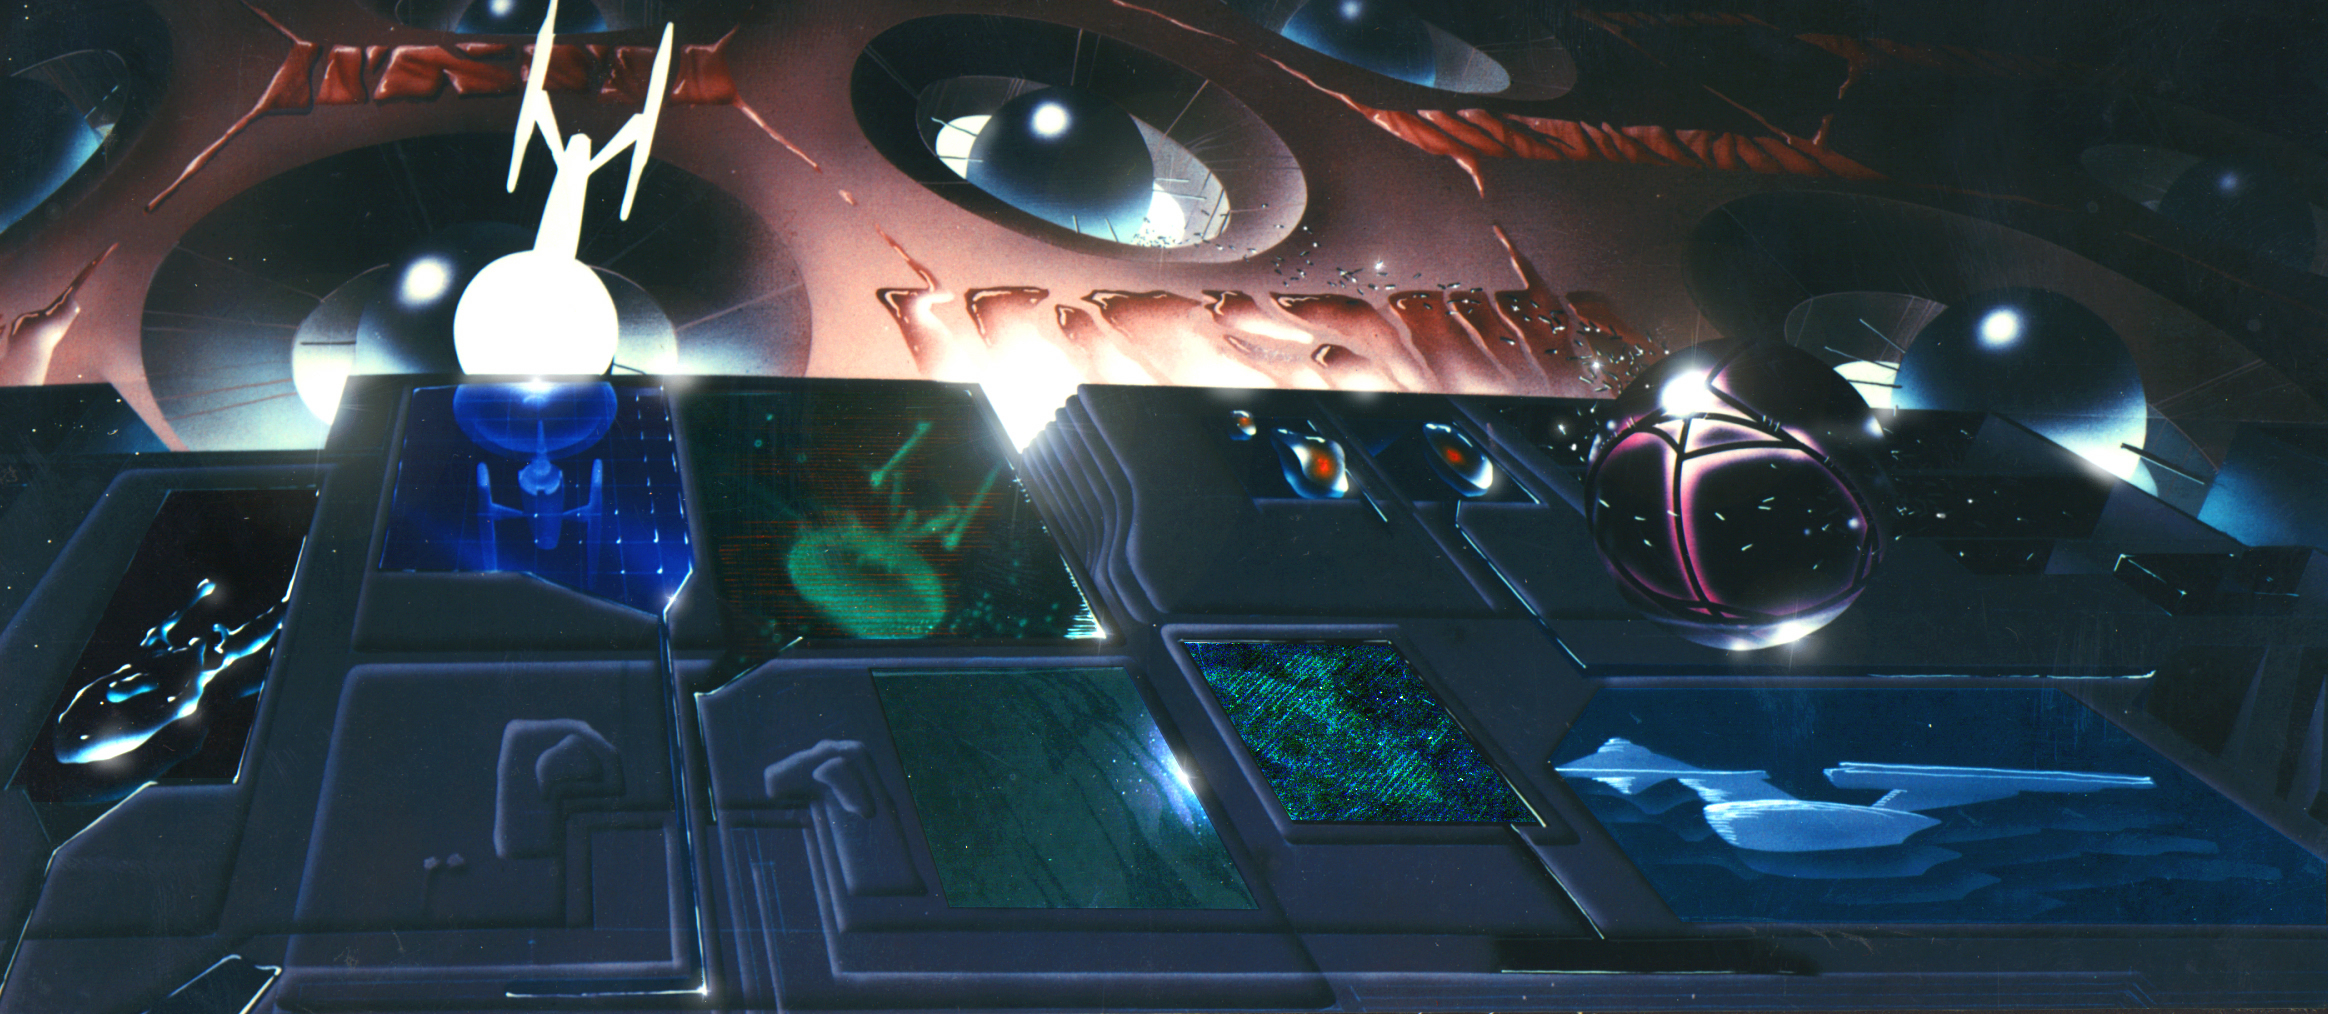
Concept illustration of V’ger studying
the Enterprise as it journeys through it.
(Image: Courtesy Richard Taylor)
Gore: Yeah. They are definitely fascinating.
Taylor: You know I had a couple of tricks figured out that were just so killer. And I won’t get into all the politics of it, but actually at Abel we would have completed all of the shots. We had the camera system built. Had one tests on some of the models. It’s the way the effects on most movies are created. You have to build things first and then roll into the production of the shoots which usually are finished during the latter part of the production schedule.
Part of the complexity of what we were doing was that at the same time we were building the models we were designing and building the hand props, and working on the sets. We did get involved in more of the production than we really should have but Bob drove us into that, and I had no control over the amount of work the studio took on.
Gore: That was Bob Wise, or Bob Abel that was dragging you into that sort of thing?
Taylor: Bob Abel. I mean if we had just designed and shot the miniatures and the other basic effects we would have been fine.
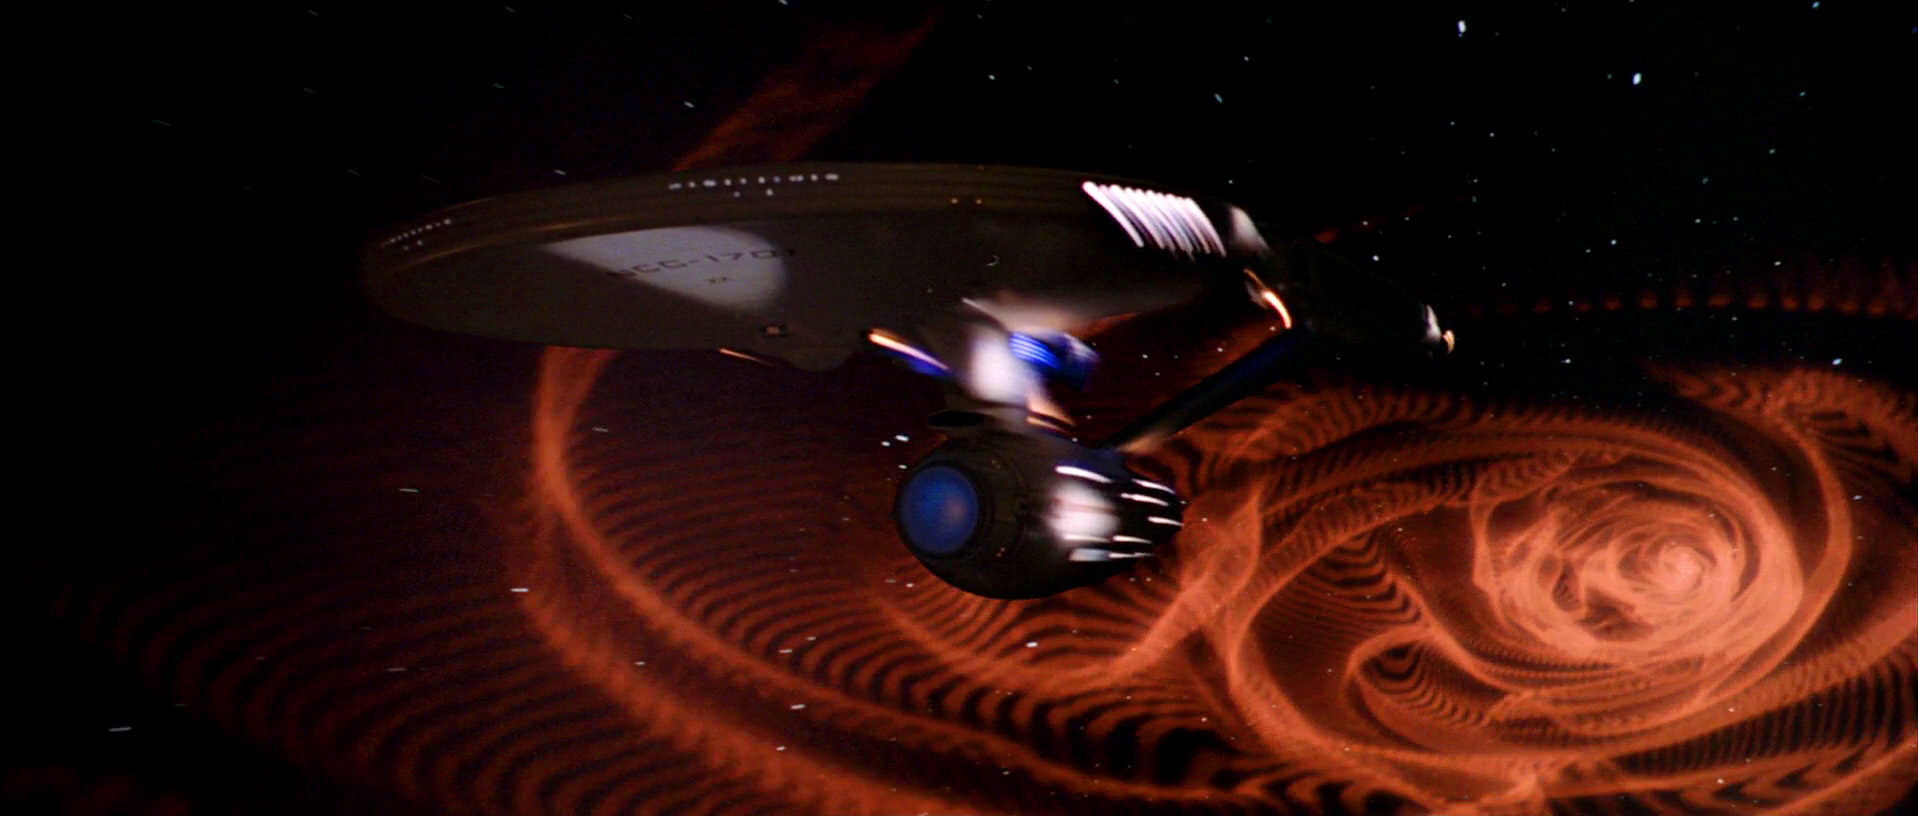
Scene from Star Trek: The Motion Picture,
of the Enterprise caught in a wormhole
when its new warp engines are tried
out for the first time.
One cool effect we did finish at Astra Image, was the wormhole sequence. We created and composited all of those shots in that sequence before the effects were taken over by EEG.
But the whole conversation of why the movie went to Trumbull, that’s a whole other thing topic. We’ll keep this interview about the models . . . specifically the Enterprise.
Gore: Yeah. That’s fine, I gotcha. (chuckles)

Pingback: Richard Taylor Interview (part II) | Third Wave Design
Pingback: Richard Taylor Interview (part IV) | Third Wave Design
So I’m still not clear on the use of the Dykem, was the blue mixed with red? If not then why does it appear violet on the model?
LikeLike
Hello William. From what I know from the interview and some (albeit limited) knowledge of drafting dies, Dykem Steel Blue layout fluid was used as is, from the bottle. It was applied to brushed aluminum metal pieces the “magnet/grill” inner insert of the warp engine nacelles. Depending on the lighting and such, this can appear from a cobalt blue to violet in color when applied to a raw metal, as can be seen in lower right photo the Fabrication Study 07 image. That image is of just the Dykem Steel Blue die applied to a sheet of aluminum.
In it the overall color is blue but also appear somewhat violet in graduation when reflecting white florescent light. We know the interior of the warp engines were florescent light tubes with colored gels over them, so depending on the angle of refraction, it could reflect a blue/violet hue. However the base color of the light was blue.
LikeLike