This past weekend, when coming back from Sisters Oregon, location of turkey consumption at the home of my better-half’s dad and his wife, I was excited to see the initial test 3D printed pieces of the workbee upper shell in the mailbox.


This past weekend, when coming back from Sisters Oregon, location of turkey consumption at the home of my better-half’s dad and his wife, I was excited to see the initial test 3D printed pieces of the workbee upper shell in the mailbox.

A big step forward last night and today. After working on some test 3D models to do some 3D printing for the workbee parts, I uploaded the initial upper hull piece to Shapeways, and it is now in production.

After purchasing the Moment of Inspiration (MoI) 3D Modeling software the other night, I have managed to make decent headway into finally getting a hyper-accurate outer shell for the workbee drawn up.

It’s been several weeks since my last post and a lot of experimenting and a possible change in direction is in the offing.

The Pro Silent Air Compressor I purchased from Golden Depot arrived today, as did the new quad airbrush stand I ordered.
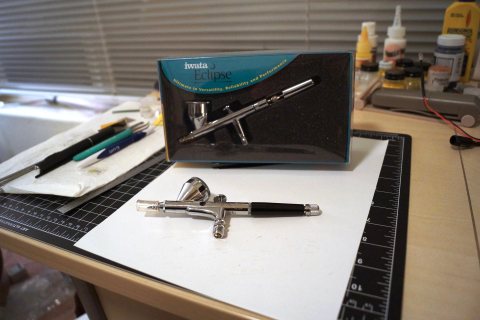
I began to finally make the leap from a single-action to dual-action airbrushing and I recently purchased two new dual-action airbrushes.

Well, I have been working with the initial draft artwork for the workbee spine. And it is as I imagined. Insanely small and pushing the envelope of being able to be cut, folded and built.

Tonight I had some success building the upper half of a workbee, this time running three of the fiber optic filaments, and then attaching the newest set of yellow printed PVC vinyl tape panels.

Tonight I assembled a decent transparency layer, and tested out threading six 0.25mm fiber optic filaments into the workbee. It was on the whole successful, though one of the side running light filaments moved while I was curing the UV adhesive, and it snapped inside the upper shell.

A quick update on this evenings progress with the workbees. Continue reading
