
This past weekend, when coming back from Sisters Oregon, location of turkey consumption at the home of my better-half’s dad and his wife, I was excited to see the initial test 3D printed pieces of the workbee upper shell in the mailbox.

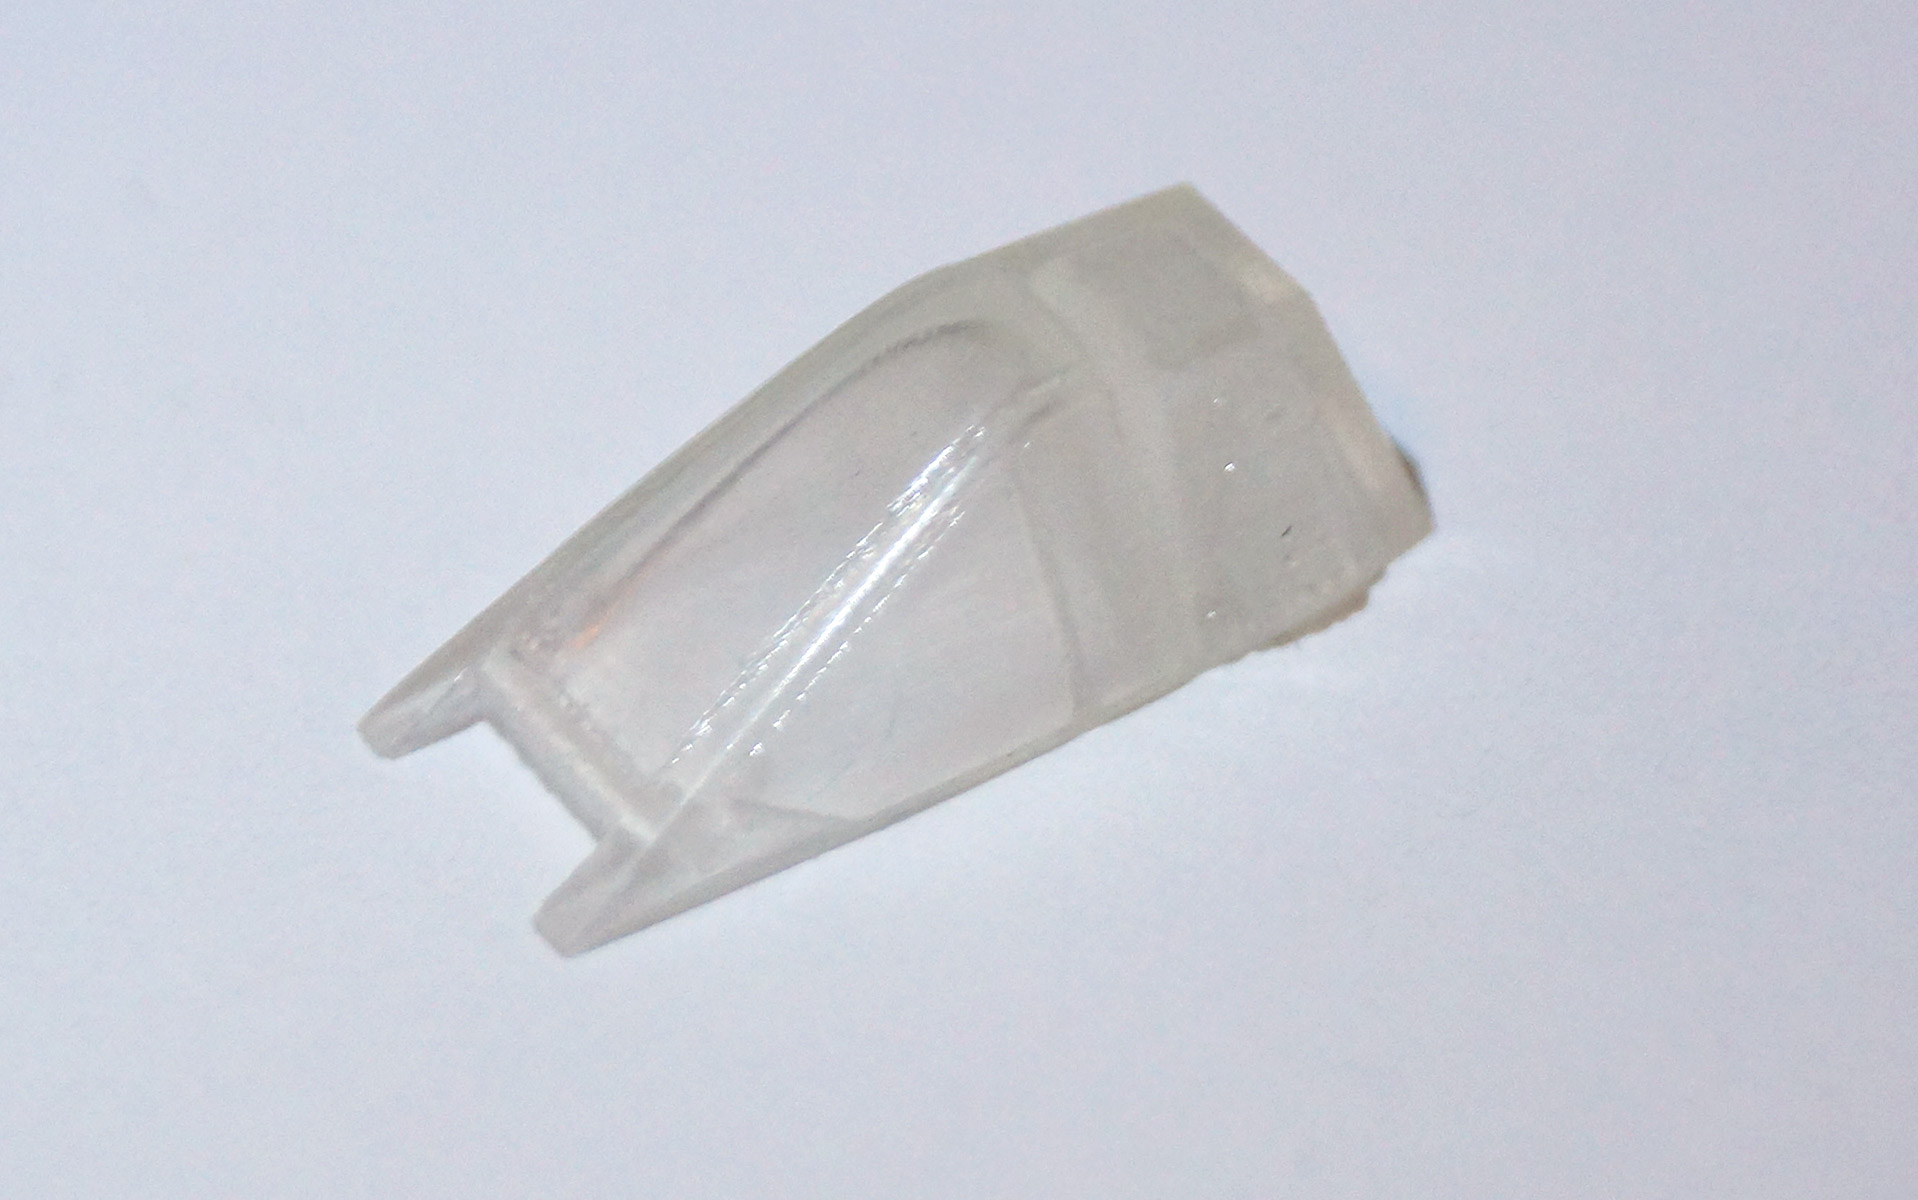
Sanded and top-coated test 3D print of
the workbee upper shell.
On the whole they turned out as I had hoped. Though there was a minor snafu on my part. When I uploaded the 3D model of the test shape, I screwed up when entering the exact size to scale the model to. I typed the correct number, 7.838 mm, which is the correct overall length of the workbee at 1:350 scale, but I typed it into the wrong field for the dimensions. I typed it into the X axis, which in the model’s XYZ axis coordinates, is the width and not the length of the craft. So the 3D test print came out 48% too big.
Pilot error on my part.
But the print themselves turned out good, and since these were a couple of test prints to see what the “Frosted Extreme Detail” (FXD) material was like to work, it was still a good test. So far the “sand-ability”, transparency/translucency, etc., even at the larger than wanted size seem to work well. I have not yet tried airbrushing paint onto it, but hope to this weekend.

Ronsonol “Zippo” lighter fuel.
There was still some residual bits of support wax material on the inside of the shells, which I tried two different methods of removing (I had ordered two pieces printed up). The first was using one of my modeling dental pick tools to scrap it out, and the second using a solvent (naphtha, aka “Ronsonol lighter fluid”) which would not adversely affect the acrylic, but does resolve most adhesive and petroleum or wax-based materials.
I actually learned about using lighter-fluid to remove adhesives and gummy residue from my days working at an engraving shop back in Illinois. One of my co-workers used it all the time to get a completely streak-free high gloss shine on plaques, and such, and since we sold lighters we have crates of the stuff to use as a cleaner.
Both methods, scraping out and using lighter fluid, worked. Though the lighter fluid left a notable opaque white appearance where the wax material had been. But lighter fluid was more thorough in eliminating all of the wax material. This was actually a good secondary test as well since I wanted to see how dipping and/or brushing on Future (aka Pledge) acrylic floor finish from S.E. Johnson, on the parts would affect the pieces. Future is a acrylic polymer which professional modelers actually use as a clear topcoat and use to “remove” scuffs and sanding scratches in clear model parts such a airplane canopies.

Pledge “Future” acrylic floor finish.
My hope was that putting on some layers of Future would seal and “fill-in” some of the micro layer-texture that the 3D printing process typically produces in a printed piece. In addition that would in turn improve the transparency of the pieces, particularly when used in conjunction with sanding down and of the “layer” markings from the 3D printing process.
Most surfaces such as paint, etc. when either semi-gloss or matt finish actually have their type of sheen due to the micro-pebbling property of the finish. This micro-pebbling scatters the reflected light in random directions thereby giving it a “dull” finish. A gloss finishes look the way they do because they have an ultra smooth surface which reflects the light in a more uniform manner due to it being a non-pebbled surface. This is what yields the reflections in a gloss finish.
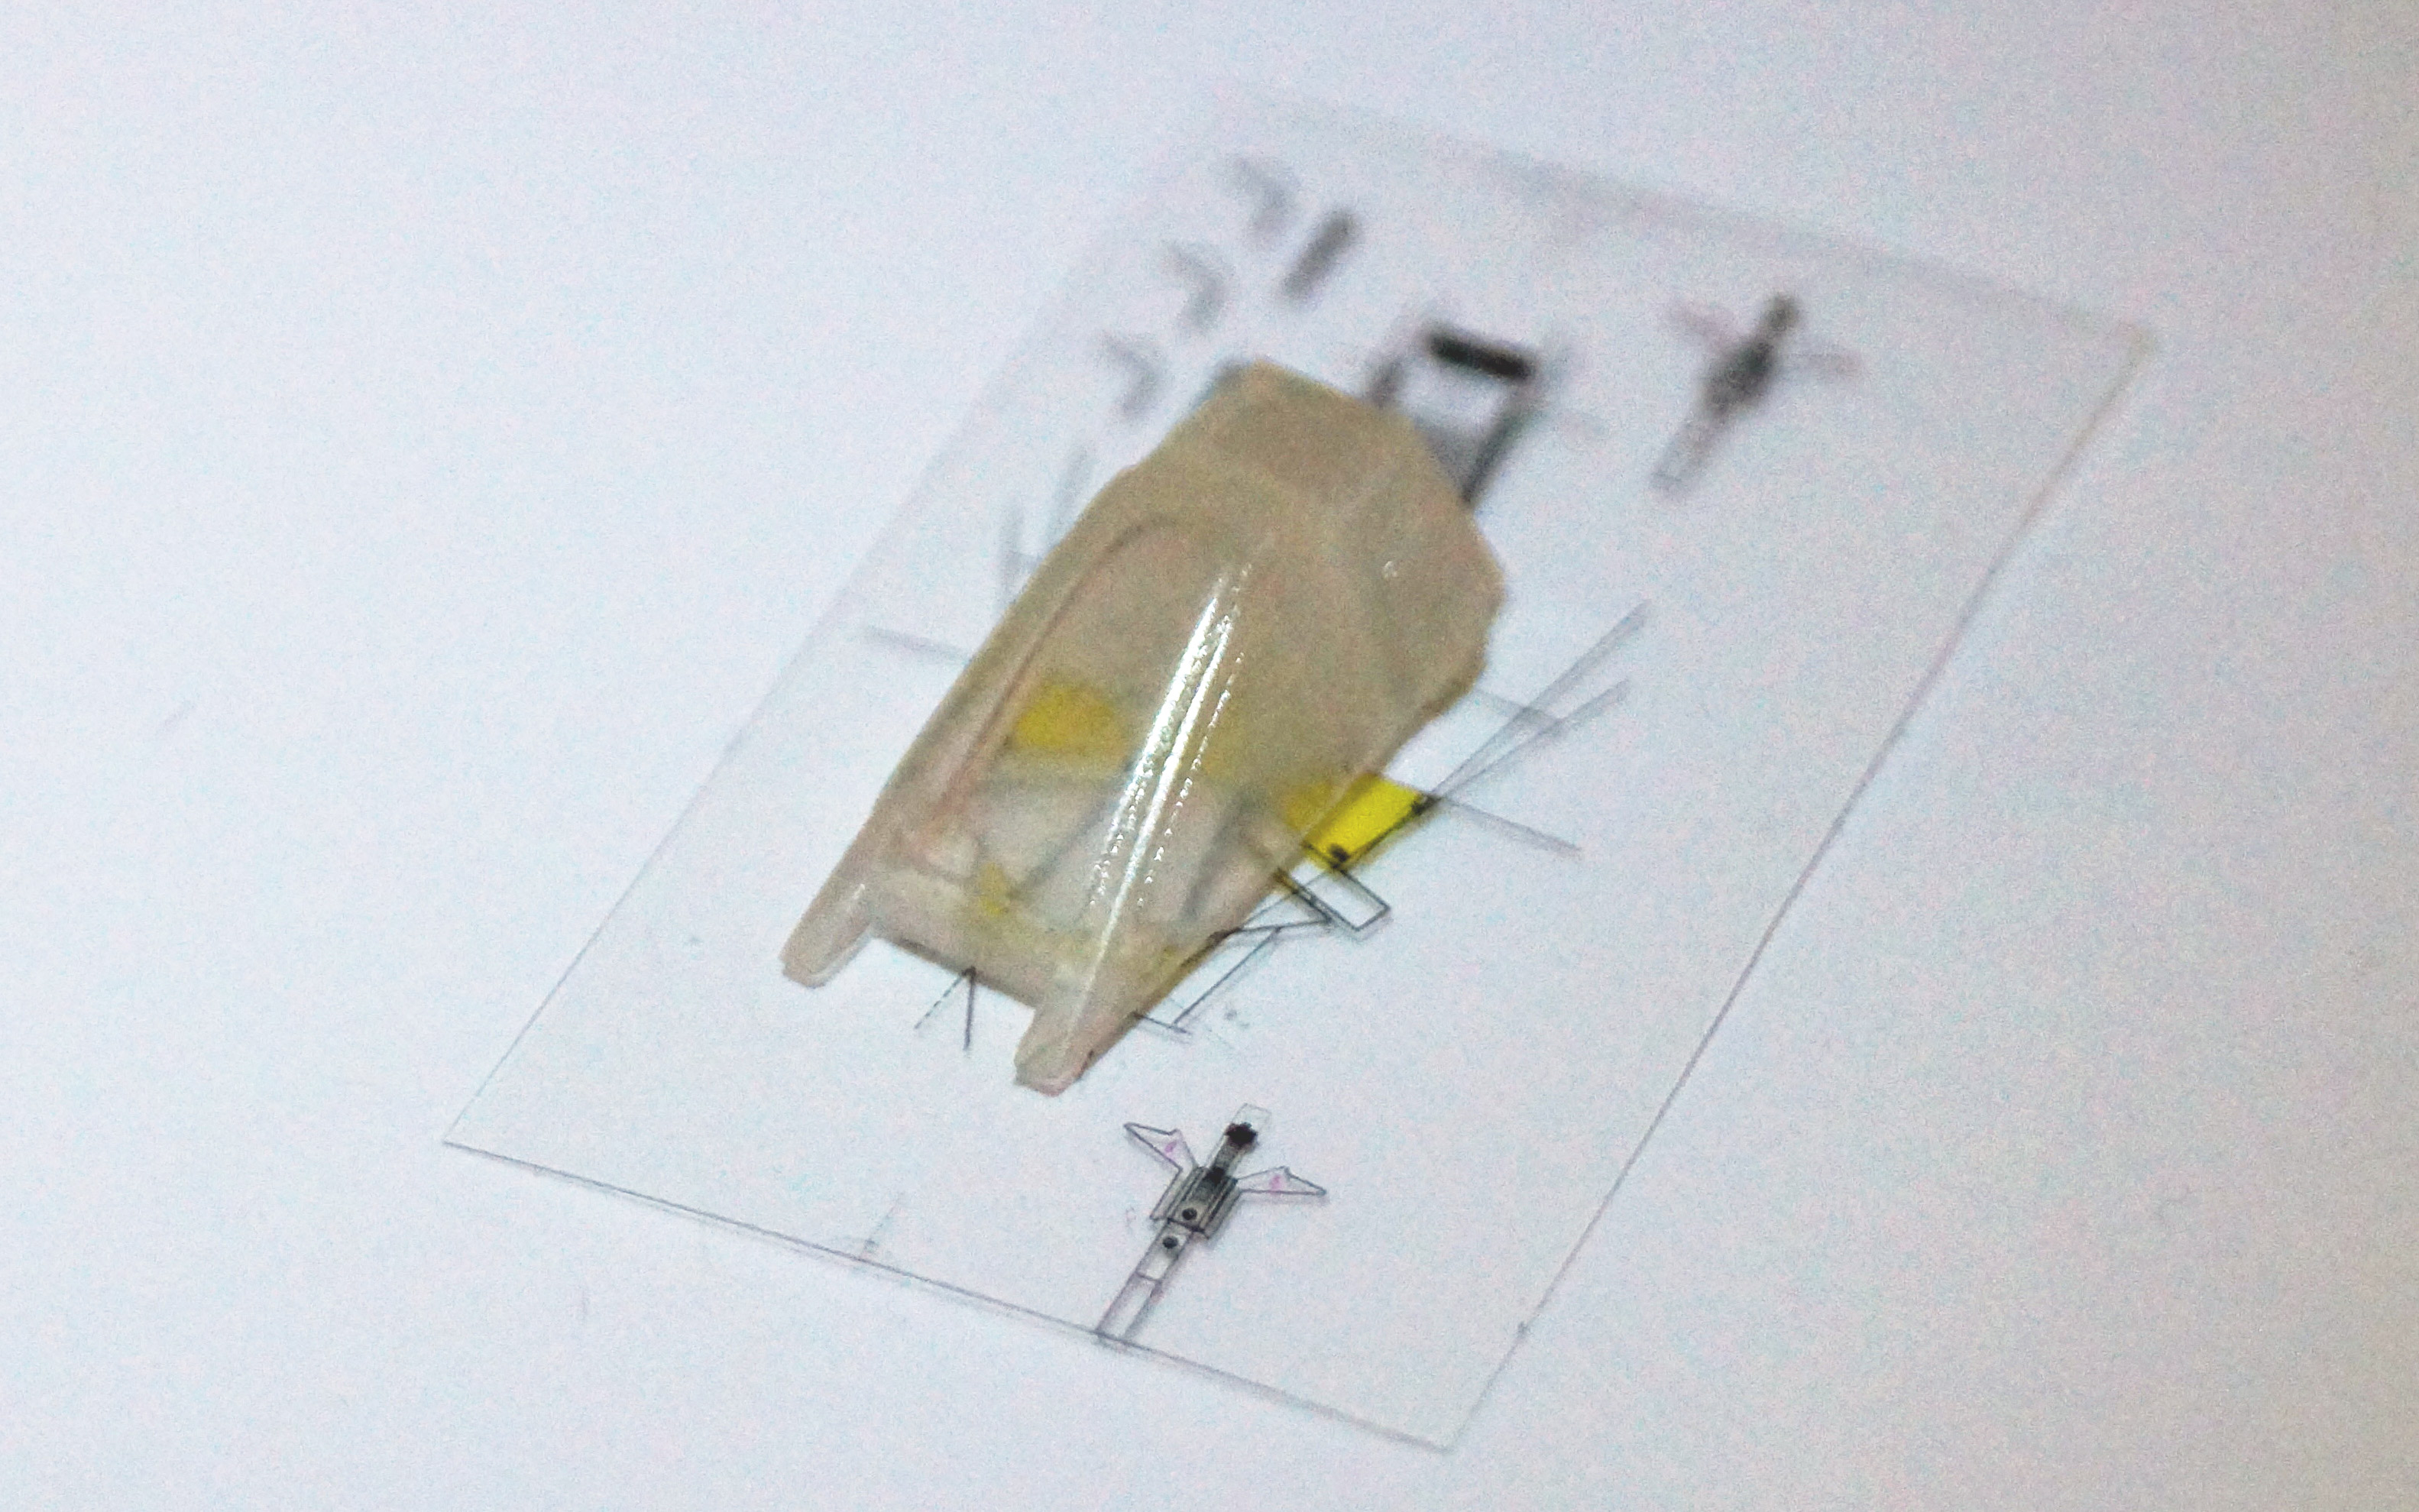
Workbee shell sitting on top of seem printed acetate showing the transparency level attuned through sanding and coating with Future.
While not yet 100% perfect as far as optical clarity, the coatings of Future combined with sanding between coats did greatly improve the transparency and surface finish of the pieces. So much so that it should be usable enough to retain having the workbee windows as part of the printed pieces.
As mentioned in the previous post, I have the windows embossed (i.e. “raised”) from the hull surface. This is to allow the windows to be sanded flush to the hull surface and to aid in masking when painting the hull (prior to sanding the windows smooth). Then polishing them using ever finer grit polishing cloth and buffing compounds. The finest of the polishing cloth I have is 8000 grit. Which is pretty much the texture of the buffing side of a fingernail buffing board.
I intend to break out the Dremel tool and use a rotary buffing cloth wheel to see if I can improve the surface smoothness even further this weekend.

Un-sanded workbee upper shell with just a single interior coating of Future acrylic.
The other main thing I wanted to see with these test pieces was the backlighting properties of the translucent FXD material. That worked fantastic, and will allow me to actually have the port and starboard running lights not be holes int he hull to thread fiber optic filaments through, but instead affixing the fiber optic threads to the backside of the translucent plastic and backlighting it. This will greatly improve the accuracy in both scale and shape of not only the running lights, but also the top-side navigation strobe housing.
I will now look into using this approach to go ahead and back-light the RCS thruster ports as well. So other than my scaling error in ordering these test pieces, it was pretty much an unqualified success.
With this knowledge in hand, I am now in the process of reworking the 3D model to add the spine, and redo the hull to have the running lights and strobe housing be part of the model and not holes.
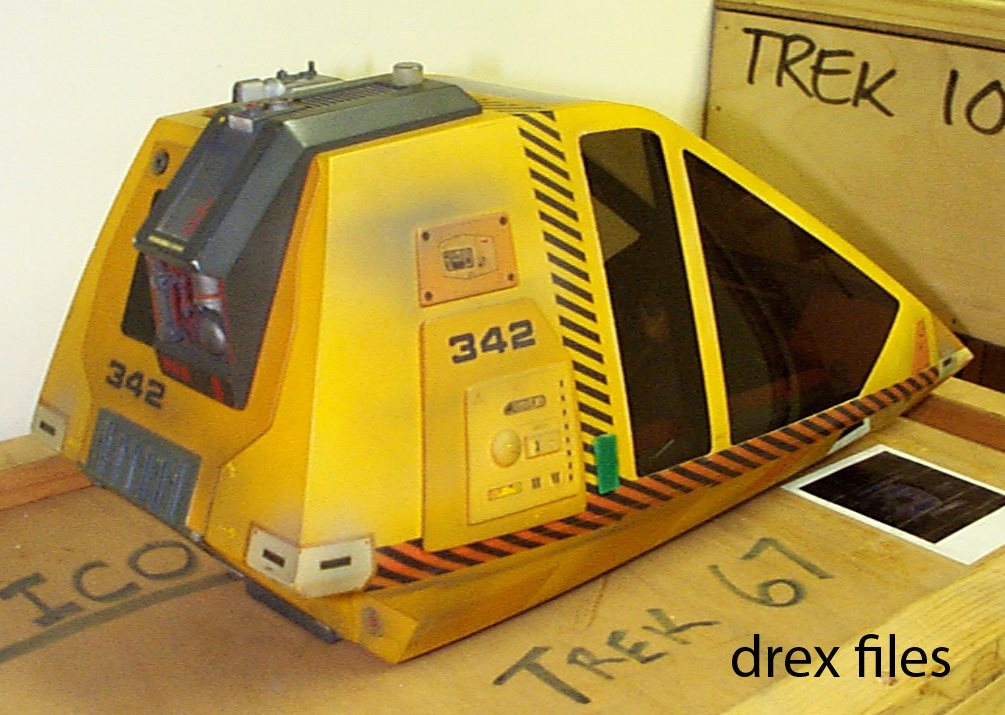
A much needed 3/4 aft view of the original workbee filming model from Doug Drexler’s webpage.
On the 3D modeling front, I finally managed to run down a few much-sought after images of the original filming model from Doug Drexler‘s Facebook page. Doug was a designer who worked on Star Trek: Voyager and Star Trek: Deep Space Nine, and is also an uber-fan. He has been an invaluable fan-resource over the years and he had a few shots of the original Magicam built workbee filming model. Of importance was he had a couple of good shots of the upper aft face of the spine, as well as a great overhead shot. This has aided trmebdiously in figuring out all the mystery detailing on the back of the spine assembly.
That said I still am in search of a good clean photo of the underside of the original filming model. That is the real mystery about making the model accurate. But these couple of new images from Doug’s page have been a great find and I am in the process of drawing up the more accurate shapes for the spine detailing and aft hatch face. And yes, 99% of all the fan-based “blueprints” and artwork are wrong about the aforementioned spine detailing.
So huge find, and I expect to make some great progress this weekend on the 3D modeling and hope to have some new test pieces uploaded to Shapeways for a new set of test prints. This time I will triple-check to make sure I order them at the correct scaling.
