
Thanks to an Amazon Christmas Gift Card, I finally broke down and purchased the 50th anniversary re-issue of an old Revell/Monogram “First Lunar Landing” model kit commemorating the Apollo 11 moon landing. This kit has a “greeble” that was used on the workbee filming miniature for Star Trek: The Motion Picture.

The kit is of the “Eagle” lunar excursion module (LEM), and consists of the LEM, Buzz Aldrin and Neil Armstrong figures, three of the lunar surface experiment packages, camera stand, the American flag, on a molded lunar surface base.

As was mentioned in the previous blog entry back on January 2, this is the model kits meant to represent the Passive Seismic Experiment Package (PSEP) the Apollo 11 mission. As part of the workbee, it is referred to as the “Package Main Attachment Connector” in the the original David Kimble blueprints produced in 1979.
Now that I actually have the kit, I was able to take precise measurements of the piece, and model it in Moment of Inspiration. It was then a simple matter of scaling it up from the 1:6 scale the original filming miniature was built at, then drop it into the 3D model of the rest of the workbee.

3D model ortho views of the Workbee “Package Main Attachment Connector”. (Image: Third Wave) 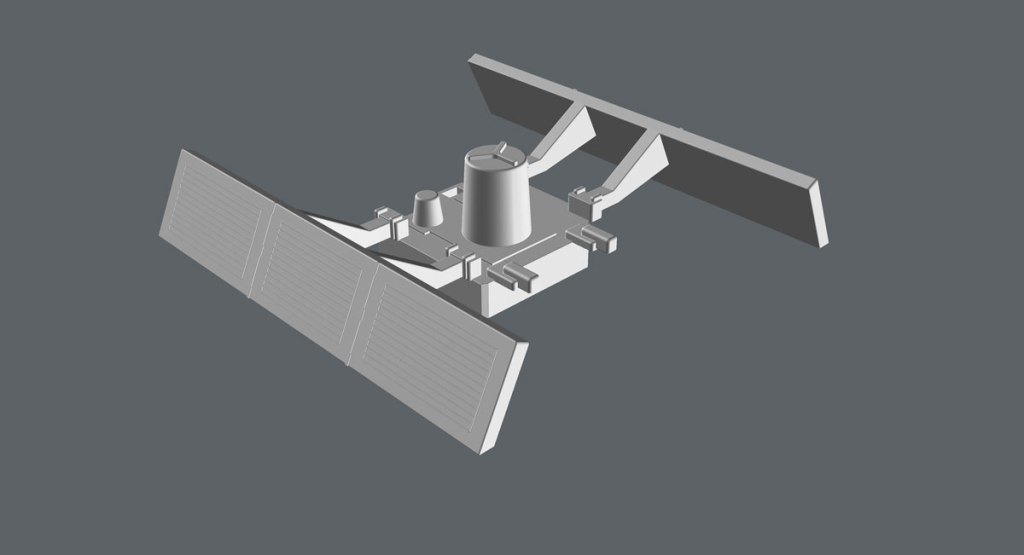
3D model perspective view of the Workbee “Package Main Attachment Connector”. (Image: Third Wave) 
3D model top plan view of the Workbee “Package Main Attachment Connector”. (Image: Third Wave) 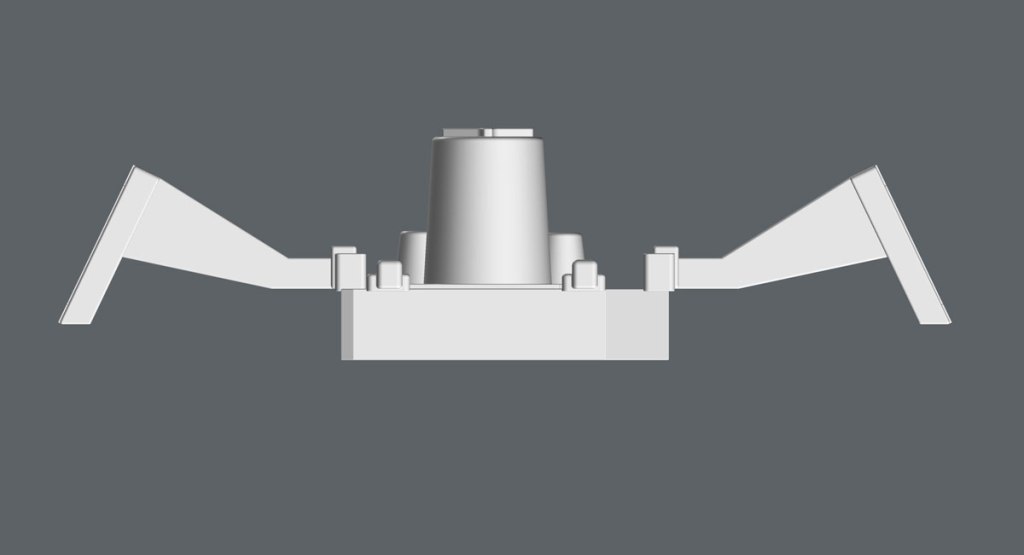
3D model front view of the Workbee “Package Main Attachment Connector”. (Image: Third Wave) 
3D model right elevation view of the Workbee “Package Main Attachment Connector”. (Image: Third Wave) 
Underside of the workbee 3D model showing the “Package Main Attachment Connector”. (Image: Third Wave)


In addition to finally having a 100% accurate representation of the package main attachment connector on the workbee, I managed to get a lot closer to completion on both the headlight louver assembly, and some place-holder designs representing the secondary thruster port vents on the aft underside.
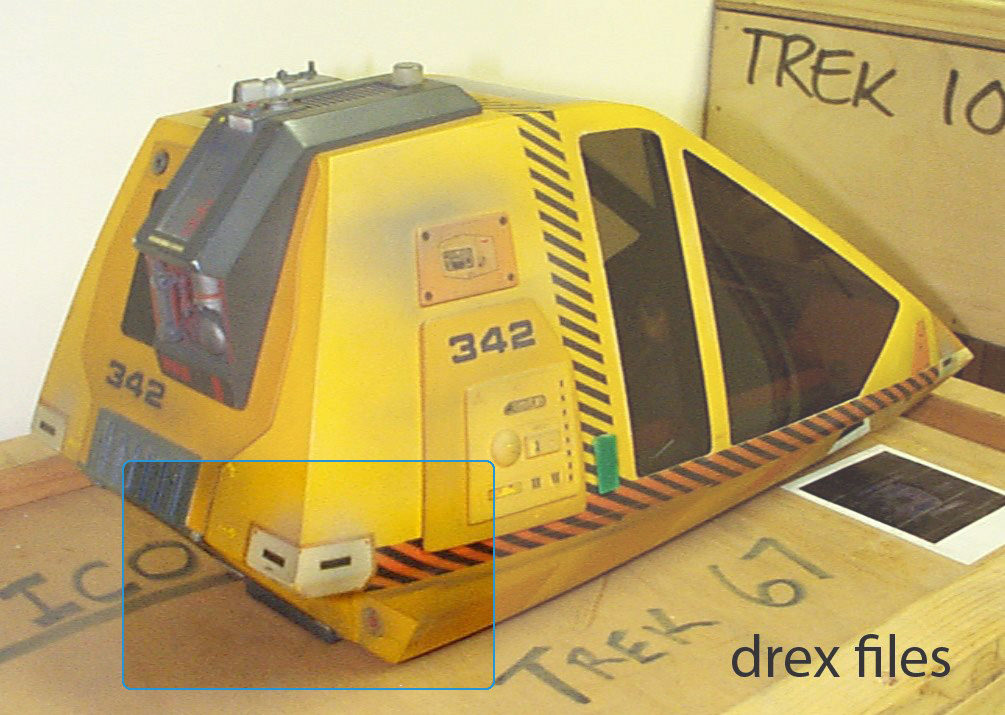
These thruster ports are simply a guess that mimics the thruster ports as modeled in one of the other fan-based 3D model recreations that I found awhile ago on the internet. I don’t have a huge amount of confidence that this is accurate to what was on the original filming miniature, as the parts used on the original filming miniature seem to have broken off and are no longer on the miniature in the few reference images I have of that area.
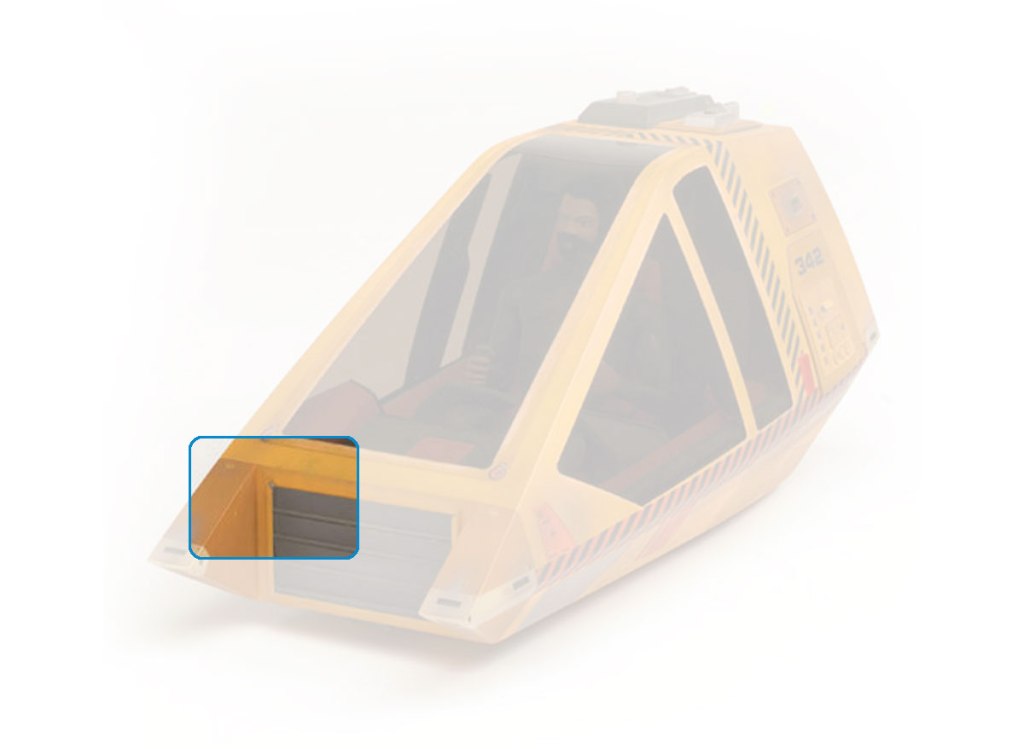
Below are the only images I have which show the area where the thruster ports are. However they appear to have the parts missing and simply some marking where they were attached.

This is the only reference image I have which shows the thruster port parts in place:

This was before some of the additional “greeble” detailing was added to the miniature.
Below is a video showing the new accurate “Package Main Attachment Connector” piece in place on the workbee model, as well as the aforementioned placeholder thruster ports:
The only remaining exterior parts I have left to model are the red and green port and starboard running lights, and the “bumble bee” paint striping. I may also do some additional detailing on the upper-left headlight assembly. There appears to be some sort of paint detailing on the top starboard headlight frame as seen in this image taken in 2006 when the filming miniature was up for auction at Christies:
I intend to model a cover plate that would house the power supply to the louver motors which I have already modeled within the headlight assembly. I hope to post a separate blog entry detailing that in the coming days.
