It has been nearly 2 weeks since posting about my recent pilgrimage to Seattle for the Star Trek 50th Anniversary exhibit. While I have not posted since then, I have actually been working a lot in trying to solve many of the various build issues with the workbees.
I can’t claim full success yet in the detail finishes of paint or assembly, I have made progress even while trying to problem-solve the issues I have run into. I still have not fully committed to using an airbrush to paint in the hull yellow. I have also tentatively explored printing on and using colored vinyl in lieu of paint.
This may be a way to get the razor sharp (and straight) edges for the window as well as having a 90%+ opaque and even color finish. I first thought of trying this approach while cutting masks with clean and sharp enough edges (as well as thickness) to overcome the problems I was having using traditional masking tapes. Between paint bleed under the tape, and the lack of perfectly straight edges this prompted me to try using vinyl masking. Thus I did some tests using electrical tape tape, or more specifically 0.18mm thick PVC tape.

Gator™ brand 220 grit sandpaper
used for microscope turf surface.
I had gone to the nearby Ace Hardware store to pick up various fine grit sand paper. I needed some for both the obvious and intended purpose, sanding, but also as a somewhat out-of-the-box approach for detailing another part of the build down-the-road; a micro scale textured surface to simulate dirt (and painted with green washes, turf and grass) for the arboretum/botanical garden part of the ship.
While there, I happened down the aisle where the electrical tape was on the shelves. What caught my eye was that electrical tape, or more precisely PVC tape, actually comes in a variety of colors, including a dead-on “safety yellow” that the workbees are painted in. The particular yellow this Westape brand electrical tape came in was exactly the right yellow I had been aiming for.
This got me to thinking of not only using it for cleaner masking for painting purposes (for a variety of reasons, some mentioned above) but also experimenting to see if one of the solid-ink printers we have at work would be able to print on them. Sure enough they could. But I went a step further to see if I could run it through one of our WorkCentre 7800 color laser printers on a setting for heavy card stock. To the credit of Xerox engineers, it could. Not only that it would produce a higher resolution print (2400 dpi vs 600 dpi) which yields much finer detail and lines. In addition it also fused the printed toner onto the tape surface better than the solid ink did. This was critical when the tape will get stressed by flexing, and cutting with an X-Acto knife and application to the model. The solid ink, while giving a more vibrant and rich line color, would flake off with not that much abuse.
So I began reworking the underlying artwork I had drawn up in Adobe Illustrator to account of the 0.18mm thickness it would add on the outside surfaces to the workbee silhouette and to various shape faces of the hull.

Westape™ brand PVC electrical tape.
Forgetting to bring the Westape brand yellow tape with me one of the days during the week to run of a print after work, I picked up a different brand of yellow PVC tape, Tape It, from the local Fry’s during lunch for use after work. Unfortunately that brand electrical tape had several problems. While it also was printable in the laser printer, it did not yield as durable a print as the Westape brand did. This may be due to it not having the matte finish which is actually made up by having the surface composed of insanely small micro-pebbling. It was also a little darker in color than the Westape. The tape I had picked up from Ace when put side-by-side, has a slightly more matte finish as well as being more dead-on to the target yellow. The Tape-It brand was a tinge too warm in color (i.e. orange). To make matters worse, the adhesive with the Tape-It brand was a bit thicker, gummier, and with less adhesion as well as grip strength than the Westape brand does. Tape-It brand may be perfectly good electrical tape for its original intended purpose but not usable for my needs for the workbees. I will use it when I can once I get to the electrical side of wiring up the lighting, etc.
So needless to say I wasted a couple of evenings fighting with the Tape-It brand print runs, uncovering the aforementioned issues. I had hoped that using the electrical tape as a printed outer skin, or micro scale vehicle wrap, would also solve the assembly issue I was having in trying to close up the aft area. Using various glues was posing a serous challenge, in that getting the sides in the rear part of the workbee to marry up evenly with the folded down aft face was a real challenge. The size and space is just so damn small.
Enter the idea of re-working the artwork once again to make the entire aft upper-hull a piece that would be attached on the rear face, and wrap around the sides to tape the aft panel down and attach it (and pulling the roof down flush with the two side edges).
But the gumminess of the adhesive was not going to hold at all. Even the Westape brand, which was less gummy and had better grip, was not going to get the job done.
So another rework of the artwork and a new piece added to the design of the workbee acetate model. A new top-down (plan) silhouette piece at the “waterline” or the waist of the work bee, with a fold-up flap at the rear that the rear face from the upper-hull piece could then be glued onto. Thus making a sort of mid-waterline “bottom” piece.
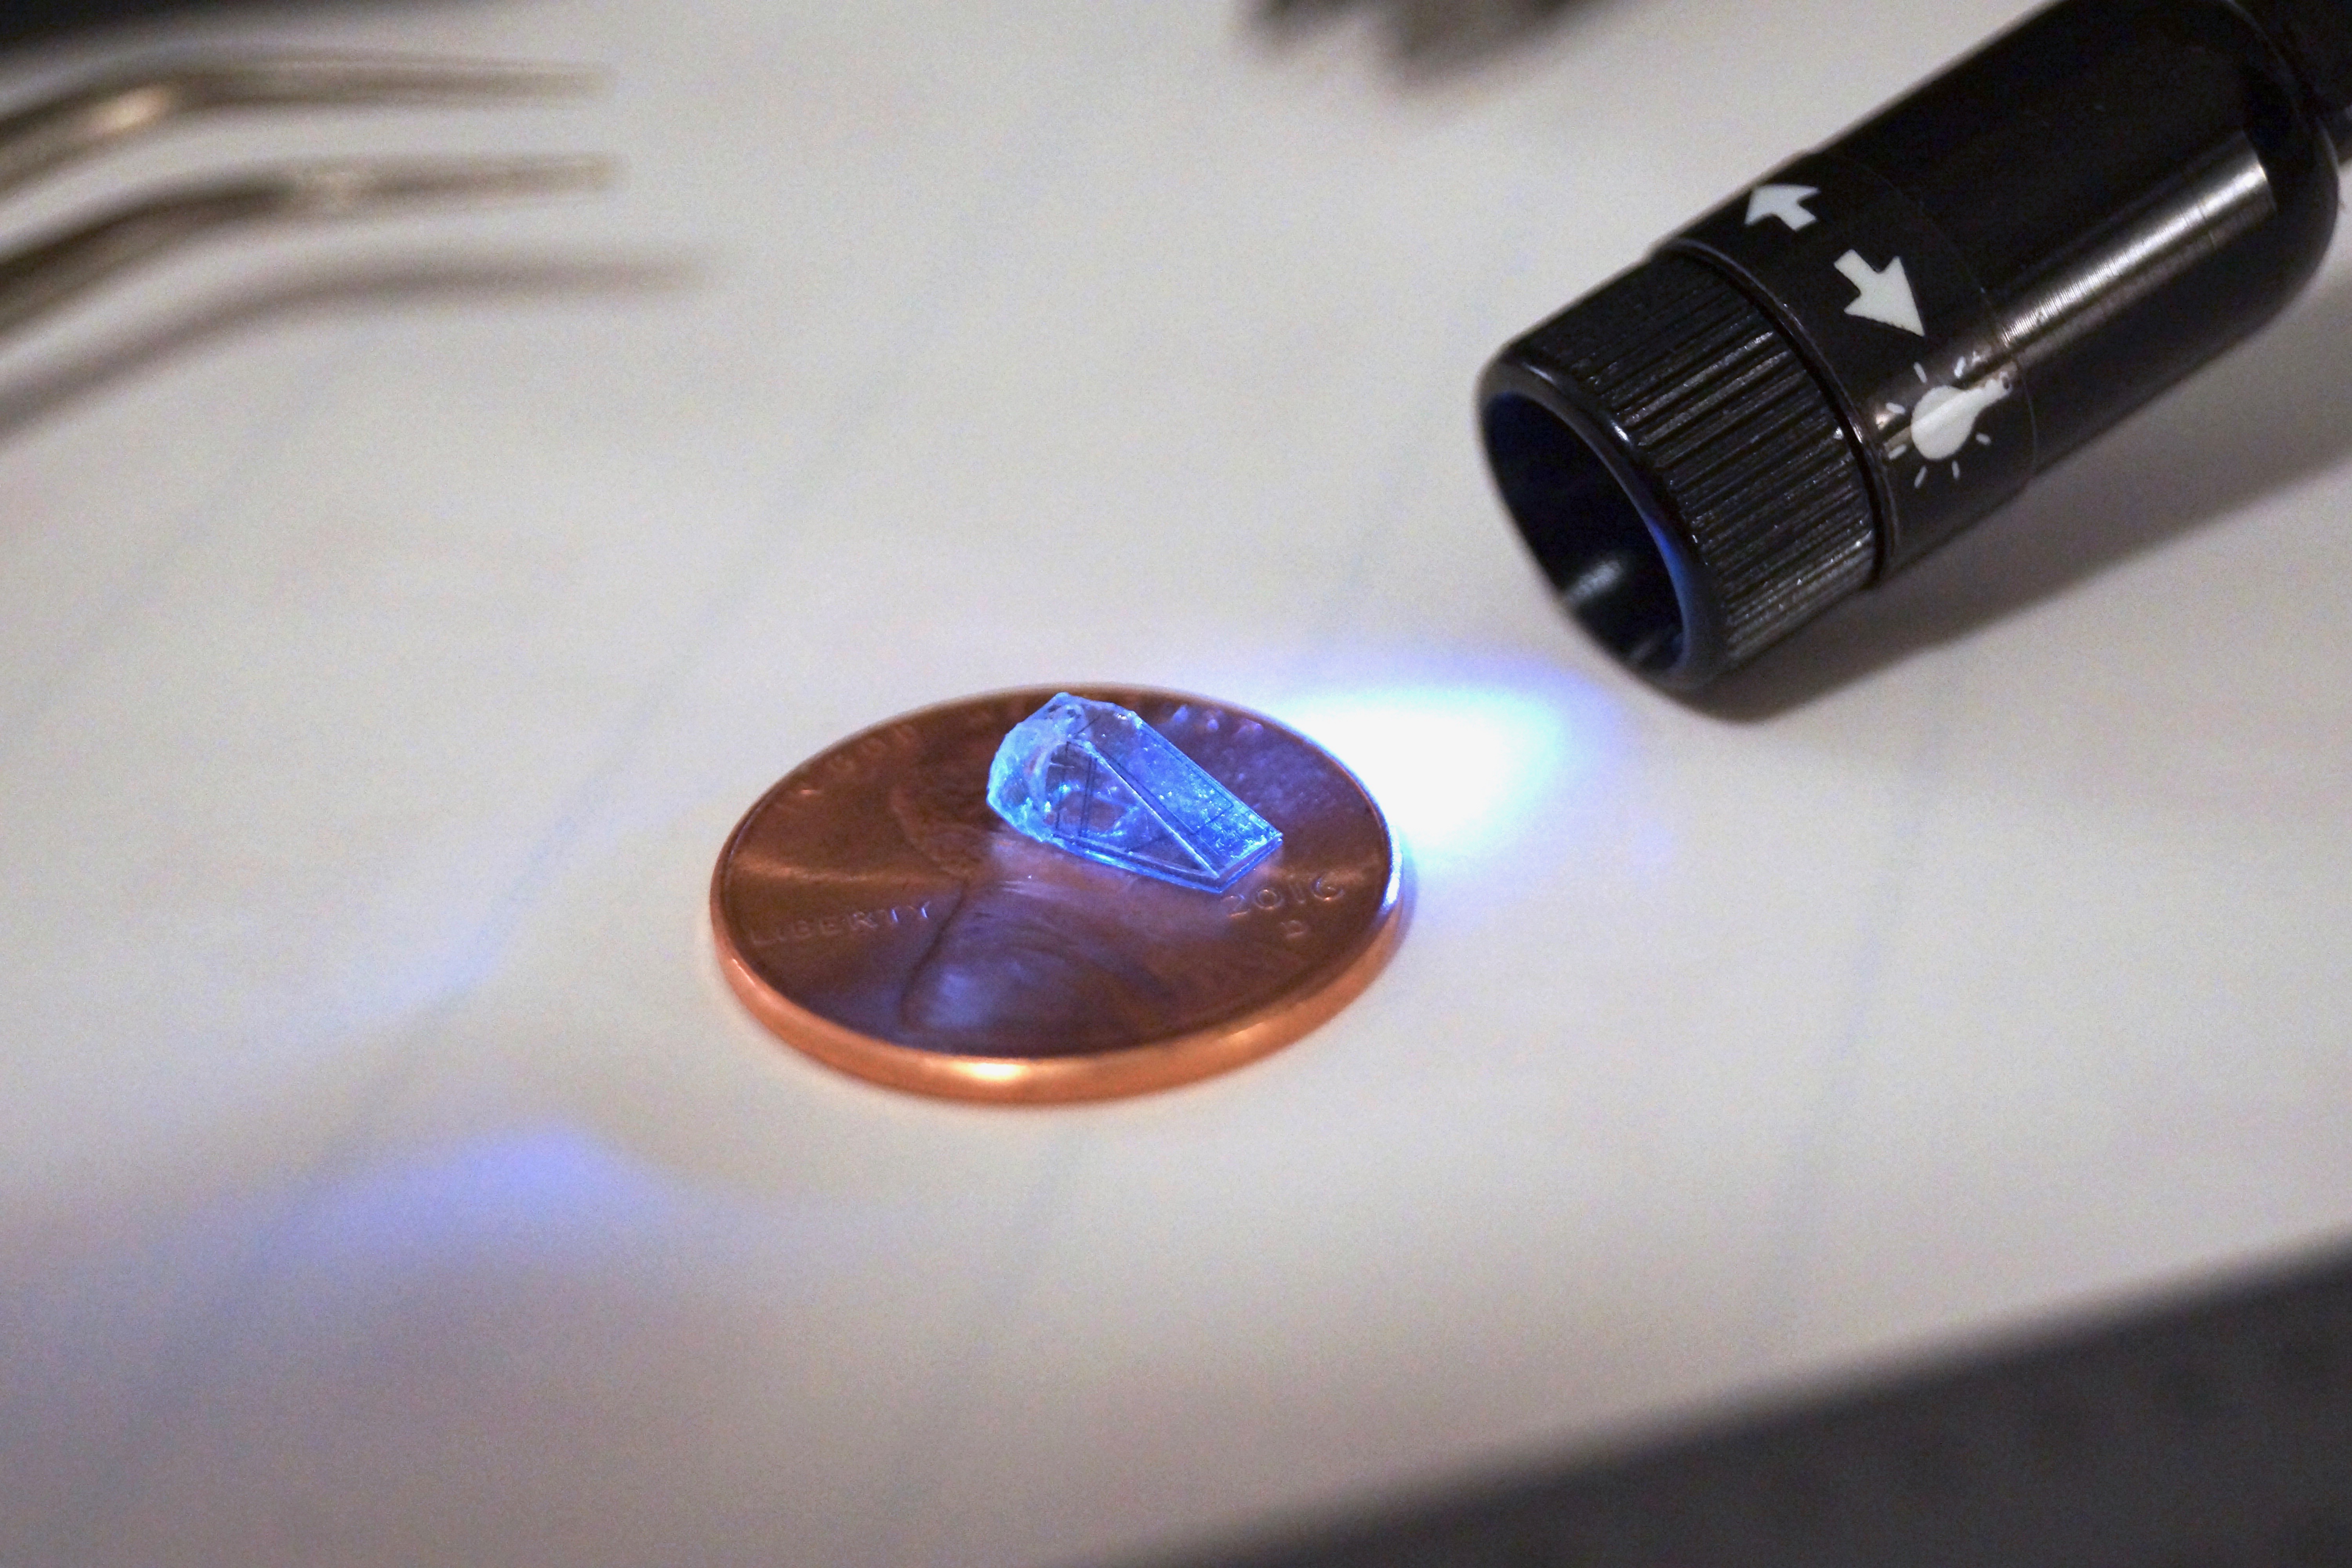
Successful unpainted upper-hull gluing test.
Note the penny it’s resting on for a sense of scale.
That bring us to this evening when I ran off new acetates, to try out this new piece with the more recent reworked upper hull part. I then quickly cut out one of the new parts and upper hull test runs, and used Lazer Bond UV cured plastic adhesive.
Success!
I finally have a good and accurately shaped aft section, that will hold together. Now the challenge is to try it a few more times to validate that I can replicate the process with enough control to make it practical for fabricating the full compliment of upper-hulls (and spares) that will be needed for the actual build.
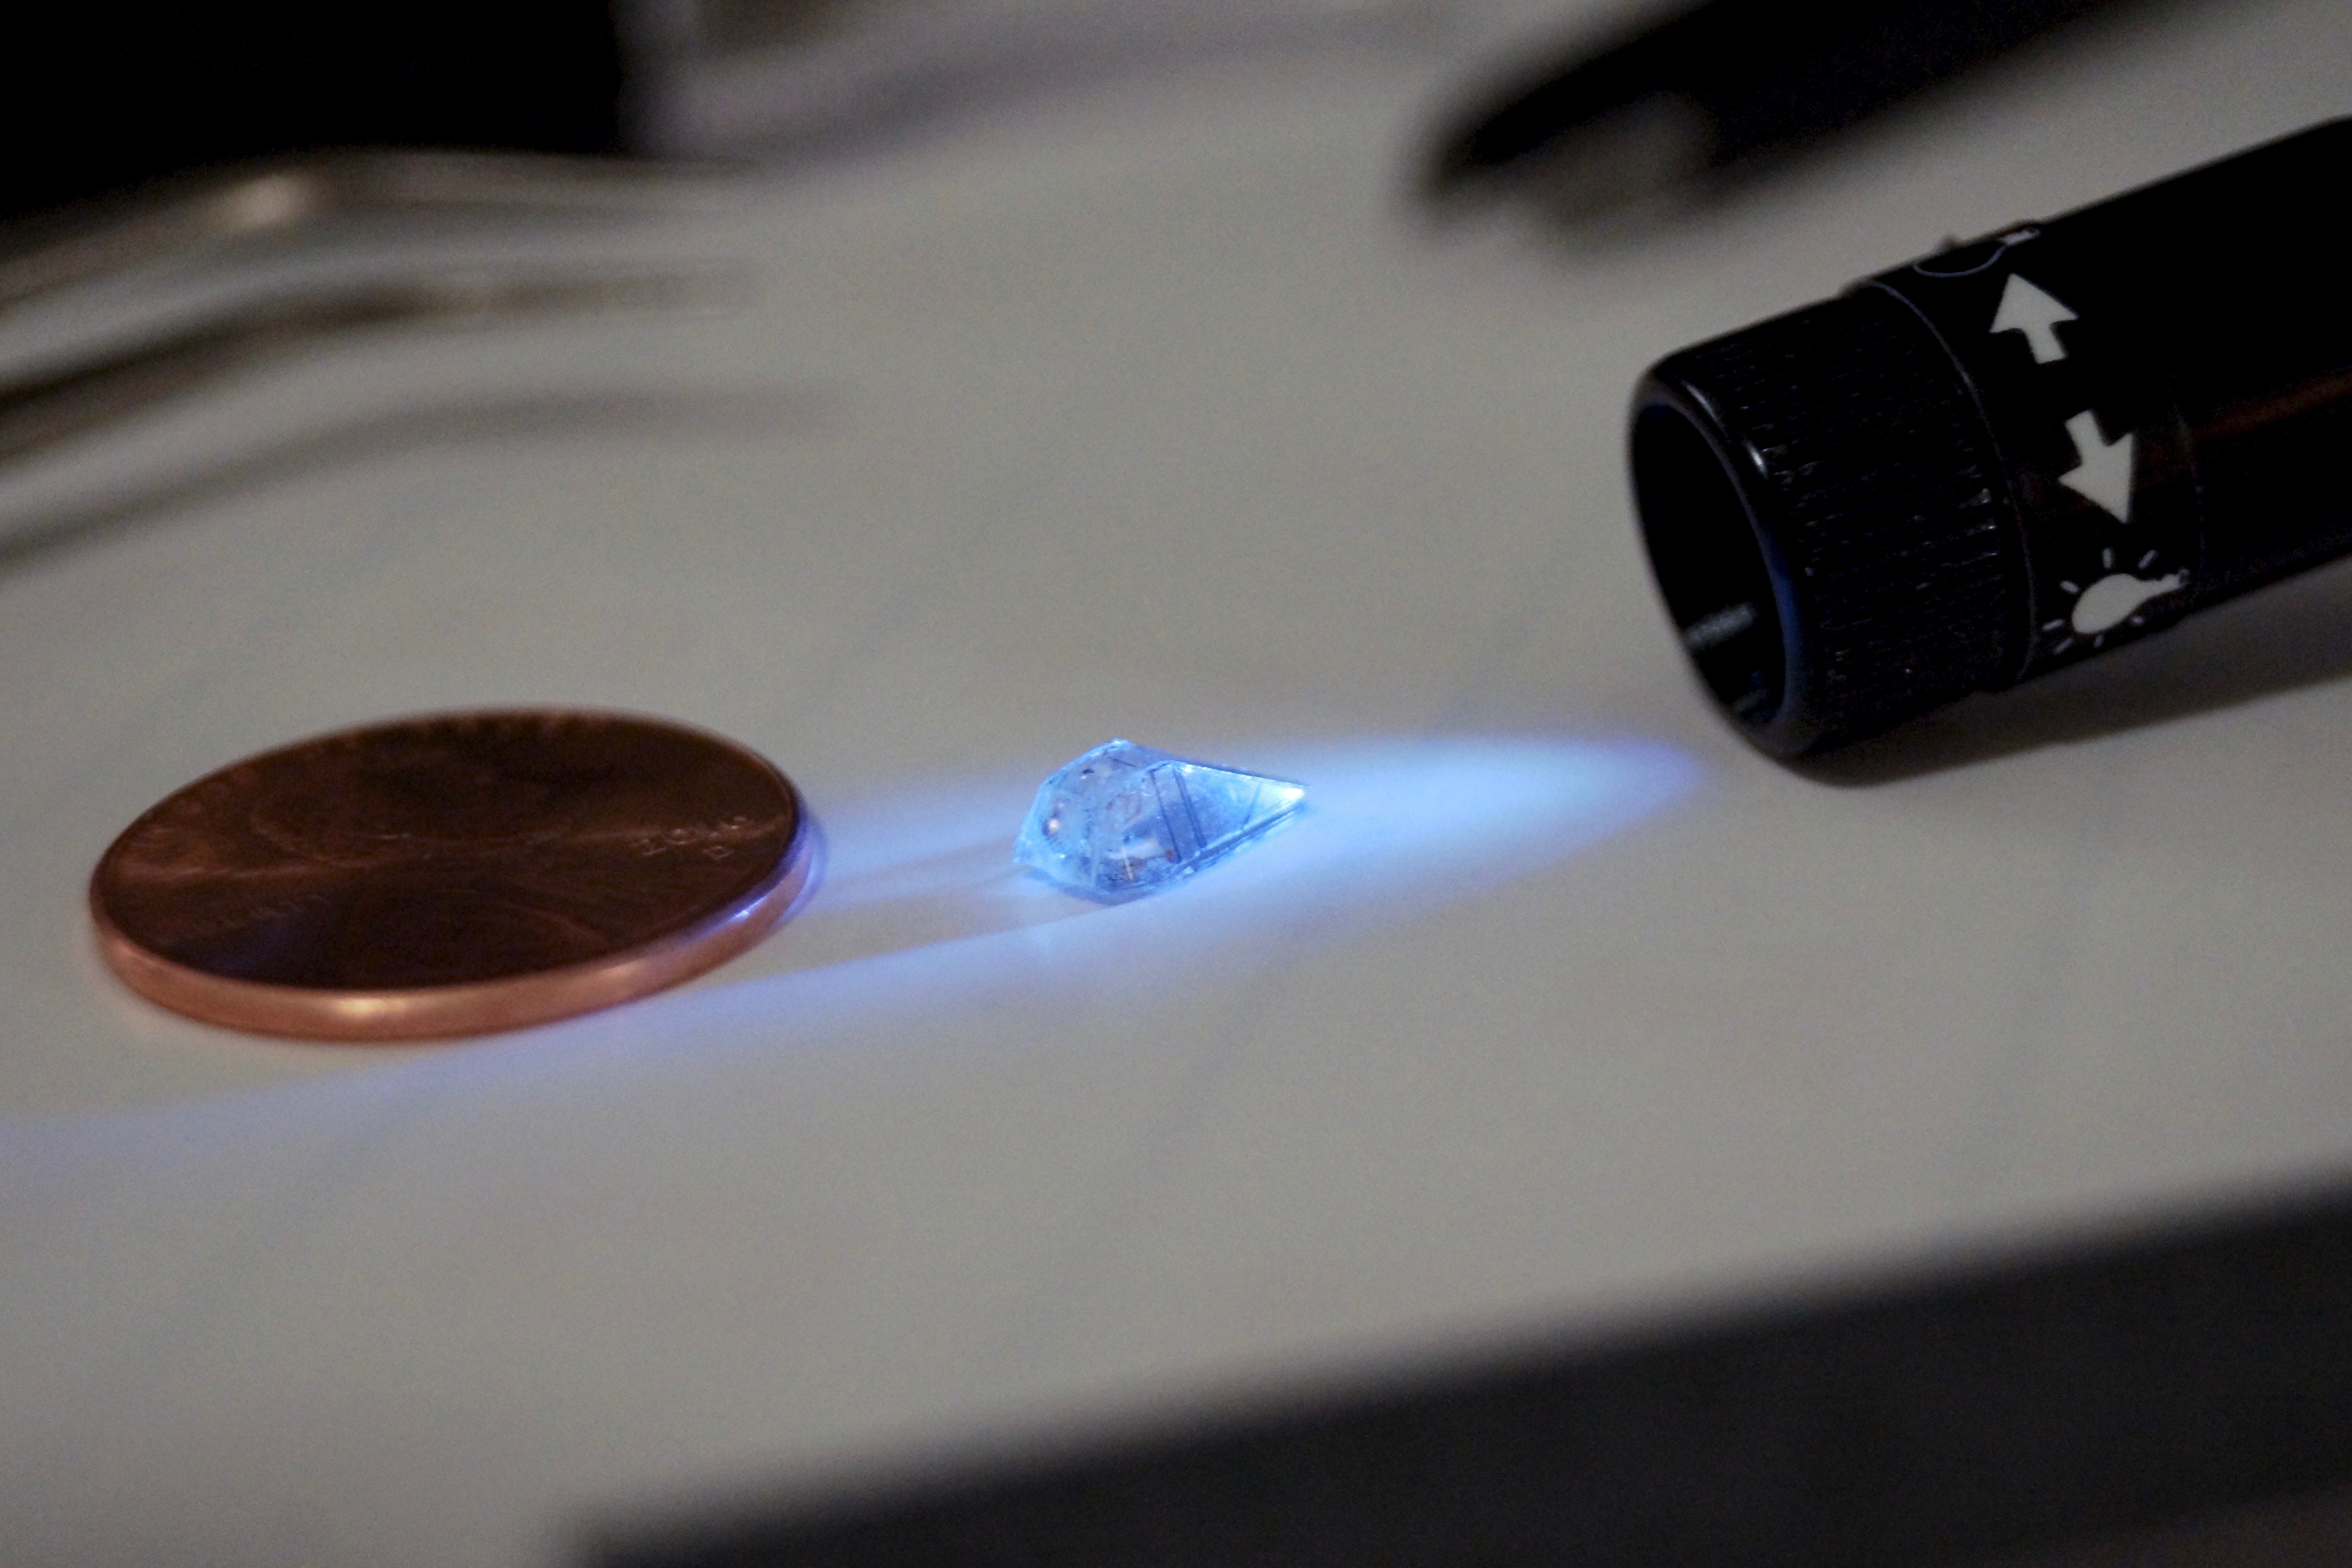
The rather roughly applied UV cured glue on
the inside makes it look messy, but the faces are
smooth and clean on the outside.
Tomorrow evening I will test cutting out and affixing onto this formed upper-hull shell, the already printed up vinyl “wraps” and see if I can get the desired results (and not a hot mess).
Not forgetting about the lighting needs for all this, I also test punched some micro holes in the electrical tape to allow me to thread through 0.25mm thick fiber optic filaments for the running lights and flashing navigation strobe light on the roof. That went off without a hitch and was successful.
In addition to all the above, I also spent a day this past weekend, running down to a locally owned auto-tinting shop on Lombard St. here in St. Johns (my neighborhood in Portland). I talked to some of the guys there about what they did with the scrap left over from when they cut window tinting film to shape. They told me they toss it all into the garbage.

Rough test application of car window tinting film
and color vinyl tape.
I asked them if they would be ok with me taking some of the uncrumpled up scraps? After explaining why I wanted it, and how I could use it for tinting the windows of scale models (the workbees have seriously dark window tinting in the actual filming model and look almost black) they were fine with me taking a variety of scrap pieces.
The guys at Mel’s Auto Tint were great and more than accommodating to my off-the-wall request. They even walked me through exactly how they apply the window tinting film to car windows.
So while doing some initial rough test gluing of the electrical tape to some inked acetate prints, I also experimented with applying some small sections of car window tinting film as well. I had some success with that.

Note the smooth reflective sheen when the
lighting angle is just right.
The desired tint color worked out good, and the sheen of the window-tinting film, when you apply it correctly, is like a black mirror. Perfect. Even when viewed with extreme magnification. It was smoother and cleaner than even unprinted, buffed and polished transparency film. Though I will need to refine how I tackle cutting and applying it depending on whether I go with the vinyl outer “wrap” approach, or sticking with painting it from the inside.
So, with all the challenges and working through them, I am hopeful I have some avenues forward that might get me to where I want these workbees to be (heh). It was definitely a couple of weeks of two steps forward, one step back, then another step back… then a step sideways, a step forward, etc.
But I am making progress, even if in small stages (pun noted).
